Refilled Ink
Not Working on Epson?
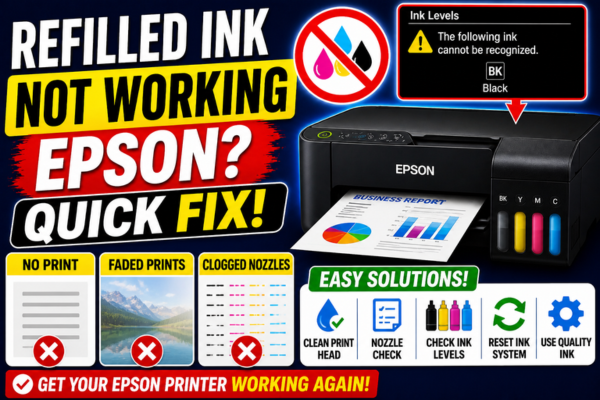
You refilled your Epson ink cartridge — but now it won’t print, isn’t recognized, or prints poorly. Here’s every reason why and how to fix it.
Refilling Epson ink cartridges is an attractive way to reduce printing costs — but it comes with a unique set of challenges that genuine cartridges never present. When a refilled cartridge fails to work, the problem is rarely the ink itself. Far more commonly, it is the chip counter that was not reset, air bubbles introduced during refilling, or a firmware authentication block that Epson has pushed through an automatic update.
Understanding the specific reason your refilled cartridge is not working is essential before applying any fix — because the solution for a chip that was not reset is completely different from the solution for air in the ink feed, which is again different from a firmware block. This guide walks through all six common failure modes for refilled Epson cartridges, with targeted fixes for each one.
Why Is Your Refilled Epson Cartridge Not Working?
A refilled Epson cartridge can fail in ways that a brand new genuine cartridge never does. The refilling process introduces risks — air bubbles, overfilling, chip counter not reset, ink viscosity mismatch — and Epson’s firmware updates add an additional layer of authentication that can suddenly block previously working refilled cartridges. Each failure type has a distinct symptom and a specific fix.
Refilled cartridges fail in three main ways: not recognized by the printer, recognized but not printing (no ink flow), or printing with poor quality (wrong colours, fading, smearing).
Most refilled cartridge failures are fixable at home — chip reset, air purging, and cleaning resolve the majority of cases. The exception is a firmware block, which requires a different strategy.
How Is Your Refilled Cartridge Failing?
Good Refill vs Bad Refill — What Makes the Difference
✅ Good Refill Practice
❌ Common Refill Mistakes
Why Is Your Refilled Epson Ink Not Working?
Chip Counter Not Reset After Refilling
Every Epson cartridge chip stores an ink level counter that is separate from the actual physical ink level. When a cartridge is refilled without resetting this counter, the printer still reads the chip as empty — and may refuse to print, show a “not recognized” error, or display a zero ink level even though the cartridge is physically full of ink.
Air Bubble Blocking the Ink Feed Path
Air introduced during the refilling process — particularly when injecting ink too quickly or when the fill hole is in the wrong location — forms a bubble that sits in the ink feed path and prevents ink from flowing to the print head nozzles. The cartridge is full of ink, but nothing reaches the paper.
03
Firmware Update Blocking Refilled Cartridge Chip
Epson’s firmware updates frequently update the chip authentication protocol. A refilled cartridge uses the chip from an old genuine cartridge — and these chips can fail the new authentication check after a firmware update, causing a previously working refilled cartridge to suddenly show as not recognized.
Fill Hole Not Properly Resealed
If the fill hole used to inject ink is not resealed with a plug or tape after refilling, air enters the cartridge over time — breaking the vacuum seal that maintains ink pressure in the nozzle. The cartridge progressively loses the ability to feed ink, producing fading then blank output.
Wrong Ink Type or Colour Loaded
Loading the wrong colour ink into a cartridge slot — a common mistake when multiple cartridges look identical — causes all prints in that colour channel to appear wrong. Additionally, using ink with the wrong viscosity (too thick or too thin) for Epson nozzles causes clogging or excessive flow.
Cartridge Overfilled Causing Ink Flood
Overfilling a cartridge — injecting more ink than the sponge or reservoir can hold — forces excess ink into the print head nozzles and can flood the waste ink path. This causes severe print quality problems, potential ink leaks onto the print head assembly, and in the worst cases, damage to the print head.
The most important thing to do before refilling any Epson cartridge is to disable automatic firmware updates on the printer. Epson pushes authentication updates silently and automatically — and a refilled cartridge that works perfectly today can become completely non-functional tomorrow after an overnight firmware update, with no warning. Setting the printer to manual firmware updates only takes 30 seconds and prevents this problem entirely going forward.
For cartridges that are already refilled and not working, the chip reset is the first fix to try. A chip resetter tool costs very little and solves the majority of refilled cartridge problems immediately. If a chip reset does not work, the next most common fix is purging the air bubble from the ink feed path — a simple process that requires only a syringe and takes a few minutes.
How to Fix Refilled Ink Not Working on Epson
💡 First Step — Disable Automatic Firmware Updates
Before any fix, disable auto firmware updates: Setup → Firmware Update → Auto Update → Off. This prevents Epson from pushing a new authentication update that blocks your refilled cartridges again immediately after you fix them.
Disable Auto Firmware Updates
On the printer panel: Setup → Firmware Update → Auto Update → Off. This prevents Epson from automatically blocking your refilled cartridges with future authentication updates.
Reset the Cartridge Chip
Use a chip resetter tool for your cartridge series. Place it on the chip contacts for 5–10 seconds until the LED confirms reset. Clean the chip contacts with a dry cloth. Reinstall and power cycle. This fixes “not recognized” and zero ink level errors.
Purge Air Bubbles from the Cartridge
Remove the cartridge. Using a syringe at the fill hole, gently draw back slightly to create a small vacuum, then push forward to move the air bubble past the nozzle membrane. Reseal the fill hole. Reinstall and run one head cleaning cycle.
Reseat the Cartridge Firmly
Remove the cartridge completely and wait 10 seconds. Push it firmly back into its slot until you hear a distinct click. A loose cartridge causes chip read failures that appear as “not recognized” or zero ink level errors.
Clean Chip Contacts on Cartridge and Printer
Wipe the gold contacts on the cartridge chip and the corresponding contacts inside the printer slot with a dry lint-free cloth. Ink residue on contacts is a common cause of recognition failures on refilled cartridges.
Power Cycle the Printer
Turn printer off, unplug from wall, wait 60 seconds, plug back in and power on. A full power cycle resets the chip reader and clears any cached error state. Combined with a chip reset, this resolves most recognition failures.
Run Head Cleaning to Prime Ink Flow
After reinstalling a refilled cartridge, run one head cleaning cycle from Setup → Maintenance → Head Cleaning. This primes the ink from the refilled cartridge into the print head nozzles. Print a nozzle check to confirm flow.
Check Fill Hole is Properly Resealed
Inspect the fill hole on the cartridge. It must be fully sealed with a plug, tape, or the original rubber stopper. An unsealed fill hole allows air to enter, breaking the ink pressure vacuum and causing fading or blank output within a few pages.
Press OK to Override Non-Genuine Warning
Some Epson models display a “non-genuine cartridge” warning but still allow printing. When the warning appears, press OK, Close, or Resume on the printer panel. If the printer proceeds — the cartridge is working despite the warning.
Fix by Specific Refill Problem
Refilled Cartridge Says “Not Recognized” or Zero Ink
Chip counter not reset — most common refill problem
Get a chip resetter for your cartridge series
Search for your cartridge number + “chip resetter” (e.g. “Epson 288 chip resetter”). These cost very little and are widely available. Confirm it is compatible with your specific cartridge series before purchasing.
Remove the cartridge and apply the resetter
Remove the cartridge from the printer. Press the chip resetter firmly onto the gold chip contacts on the cartridge and hold for 5–10 seconds until the indicator LED changes colour or flashes, confirming a successful reset.
Resetter on chip → hold 5–10 sec → LED confirms resetWipe contacts and reinstall immediately
After resetting, wipe the chip contacts with a dry lint-free cloth. Reinstall the cartridge immediately — if you wait too long the chip may revert. Push firmly until it clicks and close the cartridge door.
Power cycle and run a head cleaning
Power off and unplug for 60 seconds. Power back on. Go to Setup → Maintenance → Head Cleaning to prime ink into the nozzles. Print a nozzle check to confirm the cartridge is being read and ink is flowing.
Setup → Maintenance → Head CleaningRefilled Cartridge Recognized But Prints Blank
Air bubble blocking ink flow — cartridge full but nothing prints
Confirm this is an air bubble issue
If the nozzle check shows gaps or a completely missing colour row for the refilled cartridge — but the ink level shows as present — an air bubble is blocking the flow. This is distinct from a chip issue where the level shows zero.
Try multiple head cleaning cycles first
Run 2–3 head cleaning cycles from Setup → Maintenance → Head Cleaning. The suction from cleaning can sometimes pull a small air bubble through and restore ink flow without needing to manually purge.
Setup → Maintenance → Head Cleaning × 2–3Manually purge the air bubble with a syringe
Remove the cartridge. Carefully open or access the fill hole. Using a small syringe (no needle), attach to the fill hole and gently pull back to create a slight vacuum. You will see the air bubble move. Then gently push forward to seat the ink. Reseal the hole immediately.
Reinstall and run Power Cleaning
Reinstall the cartridge and run Setup → Maintenance → Power Cleaning. The stronger suction of Power Cleaning helps draw ink fully into the nozzles after the air bubble has been cleared. Print a nozzle check to confirm.
Setup → Maintenance → Power CleaningRefilled Cartridge Stopped Working After Epson Update
Firmware authentication change — was working before, now blocked
Confirm firmware update caused the block
Check Setup → Firmware Version and compare against the previous version. If the firmware changed recently and the cartridge stopped working on the same day — the update blocked it. No chip or cleaning fix will resolve a firmware authentication block.
Setup → Firmware Version → check recent updateDisable auto firmware updates immediately
Go to Setup → Firmware Update → Auto Update → Off. This prevents further authentication updates from being applied automatically. Do this on every Epson printer where you use refilled or third-party cartridges.
Setup → Firmware Update → Auto Update → OffTry pressing OK to bypass the warning
On some Epson models, pressing OK or Close when the non-genuine cartridge warning appears allows the printer to continue despite the authentication failure. Try this first — some models allow printing with a bypassed warning even after a firmware update.
Contact cartridge supplier for updated chip
Contact the supplier of your refilled cartridges and explain that an Epson firmware update has blocked them. Reputable suppliers release updated chips that bypass the new authentication within a few weeks of major Epson firmware releases. Request a replacement chip for your cartridge series.
For users who refill cartridges regularly, investing in a quality chip resetter specific to your Epson cartridge series is highly worthwhile. A good chip resetter costs very little, lasts for hundreds of resets, and eliminates the most common refill problem — the chip counter that was not reset — instantly. Keep one alongside your refill inks so the reset is done immediately after every refill, before reinstalling the cartridge.
Best Practices for Refilling Epson Cartridges
Frequently Asked Questions
My refilled cartridge shows full ink level but prints blank — what’s wrong?
This is almost always an air bubble blocking the ink feed path between the cartridge reservoir and the print head nozzles. The chip shows the correct ink level (full), but the air gap prevents ink from flowing. Run 2–3 head cleaning cycles first — if that does not work, manually purge the air bubble using a syringe at the fill hole as described in the Air Bubble scenario guide above.
How many times can I refill an Epson cartridge before the chip stops working?
Most Epson cartridge chips can be reset and reused 10–20 times before the chip electronics degrade enough to cause reliable recognition problems. The physical cartridge shell typically lasts 5–8 refills before the sponge or reservoir walls begin to deteriorate. When the chip starts failing resets, replace the chip rather than the entire cartridge — chip replacements are inexpensive.
Will Epson void my warranty if I use refilled cartridges?
Epson cannot void your entire printer warranty simply for using non-genuine or refilled cartridges — consumer protection laws in most countries prevent this. However, if a refilled cartridge causes physical damage to the print head (through overfilling, wrong ink type, or leaking), Epson may decline to cover that specific damage under warranty. For printers still under warranty, the risk of using refilled cartridges is primarily the potential for print head damage, not the loss of general warranty coverage.
Is refilling Epson EcoTank models different from refilling cartridge models?
Yes — significantly. EcoTank printers use refillable ink tanks rather than cartridges, so there is no chip to reset. Refilling EcoTank models is simpler and officially supported by Epson for their own ink bottles. The key requirements are using ink with the correct viscosity for Epson piezo nozzles and filling to the correct level. The firmware block issue also applies to EcoTank models if third-party ink triggers an authentication error.
When to Stop Refilling and Switch to Genuine
Sometimes the most practical solution is to switch back to genuine Epson cartridges or EcoTank ink. Consider this in these situations: