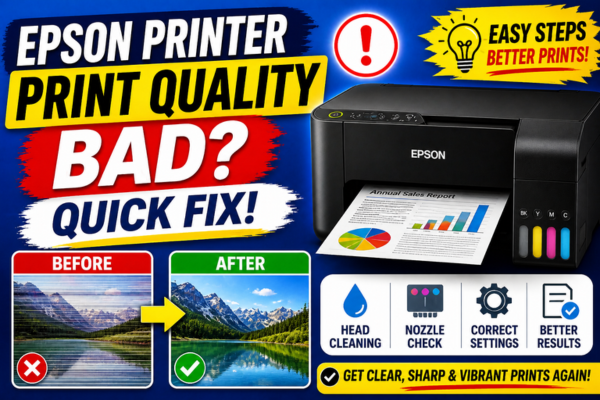
Epson Printer Print Quality Bad?
Quick Fix Guide!
Faded prints, smears, wrong colours, or blurry text? This guide diagnoses every Epson print quality problem and fixes it fast — no technician needed.
Bad print quality from an Epson printer is one of the most frustrating problems a user can encounter — particularly when you need to produce something important and the output looks nothing like it should. Whether your prints are coming out faded, streaky, blurry, smeared, or with completely wrong colours, each symptom is pointing to a specific and identifiable cause that is almost always fixable at home.
The most important first step is to accurately identify what type of bad quality you are seeing — because the fix for faded prints is completely different from the fix for smeared prints, and running a head cleaning cycle on a smear problem will not help at all. The quality issue identifier below matches each symptom to its most likely cause, giving you a targeted starting point rather than working through every possible fix at random.
Why Is Your Epson Print Quality Bad?
Epson print quality problems fall into distinct categories — each with its own cause and fix. Faded or light output almost always means clogged nozzles or low ink. Smearing means wet ink is being disturbed before drying. Wrong colours point to a colour profile or cartridge issue. Blurry or misaligned text indicates a print head alignment problem. Identifying which type you have is the most important first step — it saves you from applying fixes that will not work for your specific problem.
Before any fix, print a nozzle check from Setup → Maintenance → Nozzle Check. Gaps in the pattern confirm a clog. A perfect pattern means the issue is settings, alignment, or paper-related.
Over 95% of Epson print quality problems are fixable without a technician. The fix is almost never the printer hardware — it is ink, settings, paper, or alignment.
What Does Your Bad Print Look Like?
Faded / Light Output
Print looks washed out, pale, or much lighter than it should be.
→ Clogged nozzles or low ink
Horizontal Lines / Banding
Regular white lines or stripes running across the page.
→ Partially clogged nozzles
Smearing or Smudging
Ink smears across the page or smudges when touched.
→ Wrong paper type or dirty rollers
Wrong Colours
Colours look completely off — photos have a colour cast or text has wrong tones.
→ Colour profile or cartridge issue
Blurry or Fuzzy Text
Text looks soft, slightly doubled, or out of focus.
→ Print head misalignment
Grainy Photo Prints
Photos look grainy or pixelated, especially in shadow areas.
→ Low resolution or wrong paper
Colours Bleeding Together
Colours run into each other, edges are fuzzy, ink spreads.
→ Wrong paper type selected
Uneven Coverage / Patchy
Solid colour areas have light and dark patches or inconsistent density.
→ Nozzle clog or low ink
Why Is Epson Print Quality Poor?
Clogged or Partially Blocked Print Head Nozzles
The most common cause of bad print quality across all Epson models. Partially clogged nozzles deliver less ink than they should, producing faded areas, horizontal white lines, and patchy coverage. The nozzle check pattern immediately confirms whether a clog is present and which colours are affected.
Wrong Paper Type Selected in Driver
Selecting the wrong paper type in the print driver is one of the most overlooked causes of quality problems. Printing a photo on a setting designed for plain paper delivers too much or too little ink — causing smearing, bleeding, or a dull flat look. Every paper type requires a matching driver setting for best results.
Print Head Alignment Drift
Over time — and particularly after cartridge replacements — the print head can drift slightly out of alignment. Even a fraction of a millimetre of misalignment causes blurry text, doubled edges on text and graphics, and colour fringing on photos.
Low Ink or Empty Cartridge
A cartridge that is nearly empty but not showing as empty can deliver inconsistent ink flow — producing faded, patchy, or uneven coverage particularly in solid colour areas and photo backgrounds.
Incorrect Colour Management Settings
Using the wrong ICC colour profile, having both the application and the Epson driver both managing colour simultaneously, or printing from a PDF with embedded colour profiles can produce dramatically wrong colours — including colour casts on photos and saturated or desaturated output.
Using Incompatible or Low-Quality Paper
Inkjet ink is formulated to be absorbed at a specific rate by specific paper surfaces. Using non-inkjet paper, very thin paper, or low-quality photo paper causes ink to spread, pool, smear, or dry with a dull finish regardless of the printer’s settings.
Quality Setting Too Low (Draft Mode)
Draft or Economy print modes intentionally reduce ink coverage to save ink. While acceptable for internal documents, Draft mode on photos or colour presentations produces visibly inferior output — lighter colours, visible banding, and less sharp edges.
Third-Party or Refilled Ink Cartridges
Non-genuine Epson inks use different pigment formulations that can produce colour inaccuracy, faster nozzle clogging, inconsistent flow rates, and smearing on coated papers. Third-party inks are a frequent but underappreciated cause of persistent quality problems.
Before working through the fix steps below, print a nozzle check pattern first — it takes less than two minutes and immediately tells you whether nozzle clogging is contributing to your quality problem. If the nozzle check shows gaps or missing rows, start with the head cleaning fixes. If the nozzle check is perfect, skip straight to the paper type, alignment, and colour management fixes — applying head cleaning to a non-clog quality problem wastes ink without any improvement.
How to Fix Epson Print Quality Problems — 10 Methods
💡 Match the Fix to Your Symptom
Use the Quality Issue Identifier above to find your symptom, then go directly to the relevant fix below. Applying the wrong fix wastes time and ink. For faded/lines → Fix 01–03. For smearing → Fix 04–05. For wrong colours → Fix 06–07. For blurry text → Fix 08.
Run the Nozzle Check
Go to Setup → Maintenance → Nozzle Check. Print on plain A4. Gaps or missing rows = clogged nozzles — proceed to Fix 02. Perfect pattern = not a clog issue — skip to Fix 04.
Run Head Cleaning + Print Flush
Go to Setup → Maintenance → Head Cleaning. Run one cycle then immediately print a page of solid colour blocks. Repeat up to 3 times. This combination clears clogs far more effectively than cleaning alone.
Power Cleaning for Stubborn Clogs
For persistent fading or lines after 3 standard cycles: Setup → Maintenance → Power Cleaning. Uses more ink but clears deep dried-ink blockages. Follow with a colour flush print and nozzle check.
Match Paper Type in Driver
Open print dialog → Properties → Media Type. Select the exact paper you are using — Plain Paper, Glossy Photo Paper, Matte, etc. Wrong paper type is the #1 cause of smearing, bleeding colours, and dull photo output.
Replace Low or Empty Cartridges
Check ink levels: Setup → Ink Levels or via the Epson utility. Replace any cartridge showing low or empty. A near-empty cartridge causes faded, patchy, and inconsistent output before the level shows zero.
Run Print Head Alignment
Go to Setup → Maintenance → Print Head Alignment. Follow the on-screen instructions to print and select the best-aligned patterns. Fixes blurry text, doubled edges, and colour fringing — especially after cartridge replacement.
Fix Colour Management Settings
In the Epson driver: set Colour Management to Epson Manages Colours OR let the application manage — never both. Dual colour management produces colour casts and wrong tones. For photos, use the correct ICC profile for your paper.
Raise the Print Quality Setting
In the print dialog → Properties → Quality. For photos select Best or Photo. For documents use Normal. Draft mode intentionally reduces ink coverage and produces visibly inferior output on anything other than plain text.
Use the Correct Epson-Branded Paper
For photos: use Epson Premium Photo Paper Glossy or Epson Ultra Premium. For documents: use Epson Bright White inkjet paper. Epson ink is optimised for Epson paper — third-party papers frequently cause smearing and colour inaccuracy.
Reinstall the Printer Driver
Uninstall the Epson driver from Settings → Apps. Download the latest Full Feature Driver from epson.com/support. Reinstall as administrator. Corrupt drivers cause colour management failures and incorrect print rendering.
Fix by Specific Quality Problem
Fixing Ink Smearing and Smudging
Ink wet-looking, smears when touched, or transfers to other pages
Select the correct paper type in the driver
Smearing is almost always caused by the driver sending too much ink for the paper type — the paper cannot absorb it quickly enough. Match the Media Type setting exactly to your paper. If using glossy paper, select the specific glossy type.
Print → Properties → Media Type → match exactlyClean the paper feed rollers
Dirty rollers with dried ink on their surface can transfer ink smears onto fresh paper as it feeds. Go to Setup → Maintenance → Paper Guide Cleaning to clean the rollers automatically.
Setup → Maintenance → Paper Guide CleaningAllow prints to dry fully before handling
Inkjet ink on photo paper can take 30–60 seconds to fully set on the surface. Picking up prints immediately and stacking them causes smearing between pages. Allow each print to rest flat for at least 1 minute before handling.
Reduce ink density in driver settings
In the Epson driver go to Advanced → Ink Configuration → Reduce Ink Density if available. Or reduce the ink density slider in Colour Options. This reduces the amount of ink per pass and gives the paper more time to absorb between passes.
Fixing Wrong Colours on Epson Prints
Photos with colour cast, oversaturated output, or wrong skin tones
Set colour management to one source only
In the Epson driver: set Colour Management to “Epson Manages Colours” and turn off colour management in your application. OR let the application manage colours and set the driver to “No Colour Adjustment”. Never have both managing at once.
Driver → Colour Management → one source onlyCheck and reseat ink cartridges
A partially-seated or low cartridge for a specific colour produces colour cast in that colour’s range. Remove all cartridges, confirm they click in firmly, and check ink levels. Replace any cartridge showing low on a colour that appears wrong in your prints.
Run nozzle check for affected colour
Print a nozzle check and look specifically at the row for the colour that appears wrong. If that row has gaps — a clogged nozzle is causing the colour shift. Run head cleaning targeting that specific colour if your Epson utility allows selective cleaning.
Use the correct ICC profile for photo printing
For accurate photo colour, download the ICC profile for your specific Epson paper type from epson.com. Load it in your photo editor (Photoshop, Lightroom) and select it as the paper/printer profile when printing. This is the single biggest improvement for photo colour accuracy.
Fixing Blurry Text and Soft Edges
Text looks fuzzy, doubled, or slightly out of focus
Run Print Head Alignment
Go to Setup → Maintenance → Print Head Alignment. Print the alignment sheet, identify the sharpest pattern for each section, and enter the values. Blurry text is almost always alignment drift — this fix alone resolves it in the vast majority of cases.
Setup → Maintenance → Print Head AlignmentCheck paper is loaded straight and flat
Warped, curled, or skewed paper causes the print head to fire at a slightly wrong angle relative to the paper surface — producing blur that appears to be alignment-related but is actually paper handling. Use fresh, flat, properly loaded paper and confirm the paper guides are snug.
Raise the print quality to Normal or Best
Draft mode uses fewer ink drops per character — producing edges that look fuzzy compared to Normal quality. Switch to Normal quality minimum for any document where text sharpness matters. Text at Normal quality is significantly sharper than at Draft.
For users who regularly print photos, the single most impactful quality improvement that does not require any hardware changes is using the correct ICC colour profile matched to your paper type. Most users print photos using the generic “Epson Manages Colours” setting with no profile — which gives acceptable but not excellent results. Downloading the specific ICC profile for your paper from the Epson website and using it in Lightroom or Photoshop produces visibly better colour accuracy, shadow detail, and overall photo quality immediately.
Maintain Excellent Epson Print Quality
Frequently Asked Questions
My nozzle check looks perfect but print quality is still poor — why?
A perfect nozzle check with poor print quality points to one of three issues: wrong paper type selected in the driver, print head alignment drift, or incorrect colour management. Run Print Head Alignment first — it is the most common cause of quality problems that survive a clean nozzle check. Then check your paper type setting and colour management configuration.
My photos look great on screen but print with wrong colours — what’s wrong?
This is a colour management mismatch — the most common photo printing problem. The most likely cause is that both your application and the Epson driver are both applying colour correction at the same time, or neither is. Set one source to manage colour and the other to “No Colour Adjustment.” For best results, let the application (Lightroom/Photoshop) manage colour using the correct ICC profile for your paper type.
My prints were fine last week — why is the quality suddenly bad today?
Sudden quality degradation without a hardware change almost always means the printer sat unused long enough for nozzle clogging to develop — even as little as 7–10 days in a warm, dry environment. Run a nozzle check first. If gaps appear, the head cleaning + print flush trick resolves this within 2–3 cycles in most cases.
Does expensive photo paper make a significant difference to Epson print quality?
Yes — significantly. Epson inks are formulated specifically to work with Epson’s own photo paper coatings. Using Epson Premium or Ultra Premium Photo Paper with the correct media type setting produces noticeably better colour gamut, shadow detail, and surface finish compared to generic photo paper. For important prints, genuine Epson paper is worth the cost difference.
When to Contact Epson Support
If all ten fixes have been applied — including Power Cleaning, alignment, correct paper type, and driver reinstall — and print quality remains unacceptable, the print head may have permanent damage. Contact Epson support in these situations: