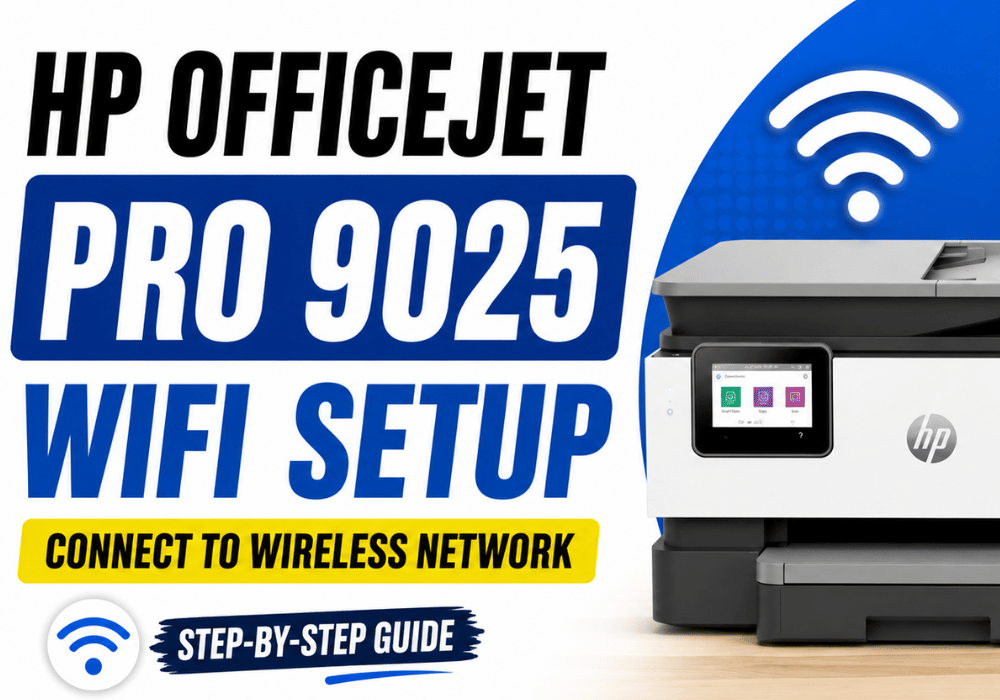

Connecting your HP OfficeJet Pro 9025 to Wi-Fi lets you print wirelessly from your computer, laptop, phone, or tablet without keeping a USB cable connected to the printer.
The good news is that the OfficeJet Pro 9025 has a touchscreen control panel, so you can connect it directly to your wireless network. You simply need your Wi-Fi network name and password before you begin.
In this guide, we’ll walk through the complete process step by step, from turning on the printer to confirming that the wireless connection is working.
What You Need Before Starting
Before beginning the Wi-Fi setup, make sure you have:
- Your HP OfficeJet Pro 9025 turned on.
- Your wireless router powered on and working.
- The name of your Wi-Fi network, also called the SSID.
- Your Wi-Fi password.
- Your printer placed within a reasonable range of the wireless router.
If possible, keep the printer relatively close to your router during the initial setup. This can make it easier for the printer to detect the wireless network.
Step 1: Turn On the HP OfficeJet Pro 9025
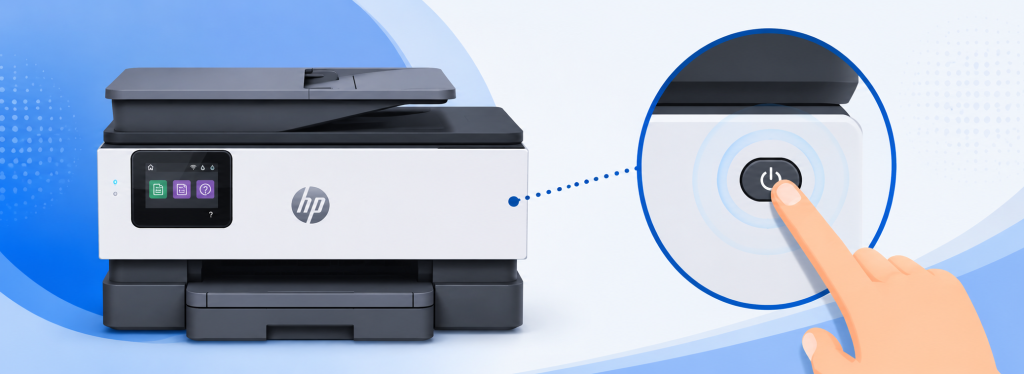
First, turn on your HP OfficeJet Pro 9025 using the power button.
Give the printer a few moments to start up completely. The touchscreen may take some time to load, so avoid immediately pressing buttons while the printer is initializing.
Wait until the printer reaches its normal home screen and is ready for use.
Step 2: Swipe Down on the Touchscreen
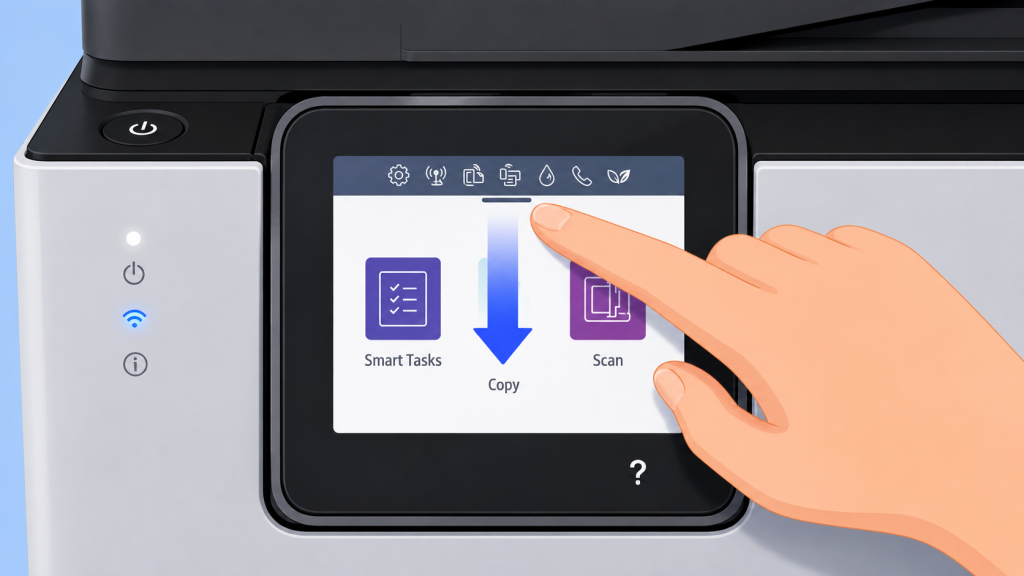
Once the printer is ready, go to the touchscreen control panel.
Place your finger near the top of the display and swipe downward.
This opens the printer’s shortcut or control area, where you can access various settings and options. HP Smart Tank 480 or 580 Won’t Connect to Wi-Fi? Try These Easy Fixes
Step 3: Open the Settings Menu
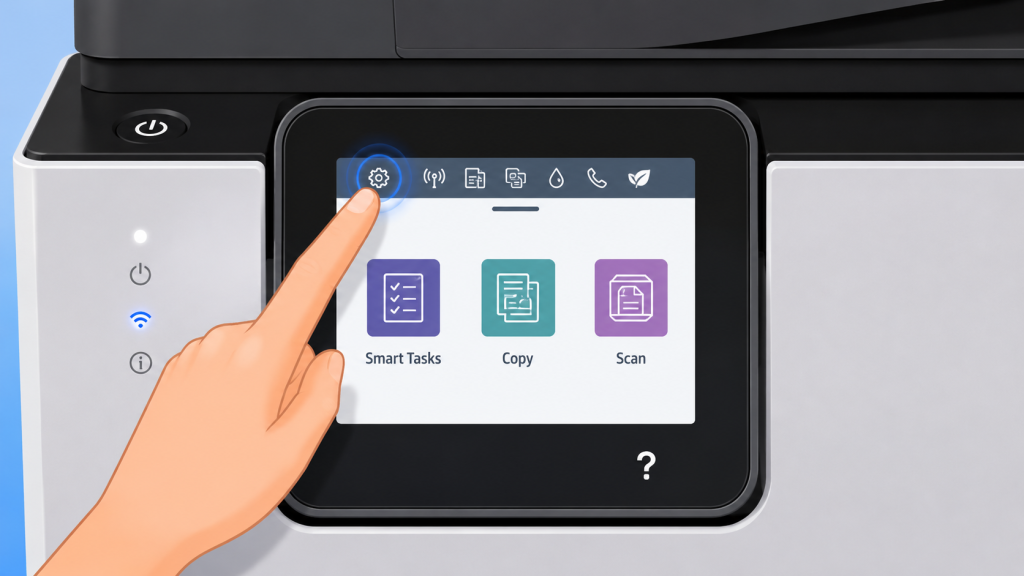
Look for the Settings icon, which is represented by a gear symbol.
Tap the Settings icon to open the printer settings.
The exact arrangement of options can vary slightly depending on the printer’s software or firmware, but the gear icon is the option you need for accessing the printer’s configuration settings.
Step 4: Select Network Setup
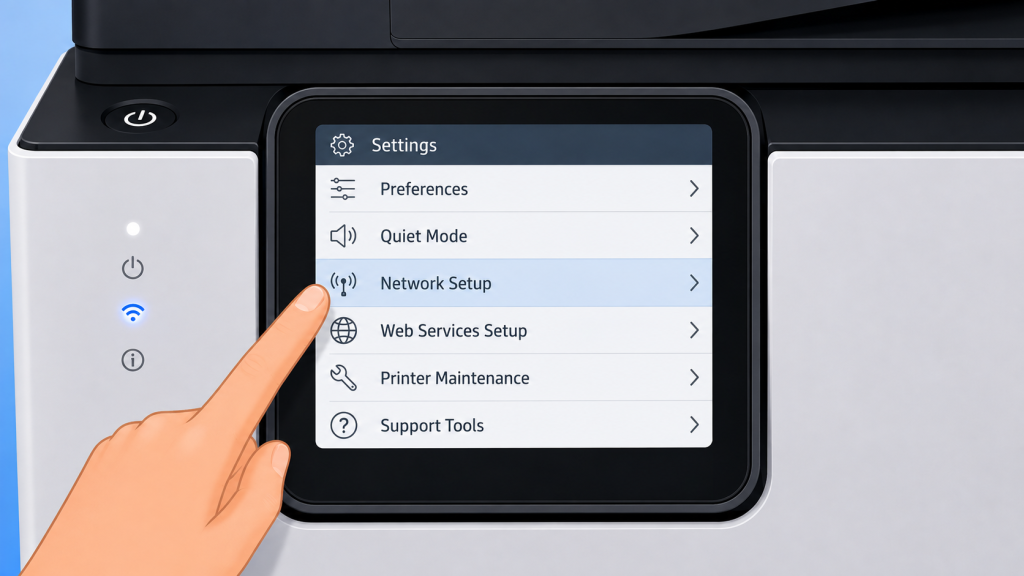
From the Settings menu, look for Network Setup.
Tap Network Setup to open the printer’s network configuration options.
This section contains the settings required to connect the printer to a wireless network. How to Fix Ink Cartridge Errors on HP Inkjet Printers
Step 5: Open Wireless Settings
Inside Network Setup, select Wireless Settings.
This takes you to the printer’s wireless configuration menu.
You may see several network-related options on the screen. Make sure you choose Wireless Settings rather than another network option.
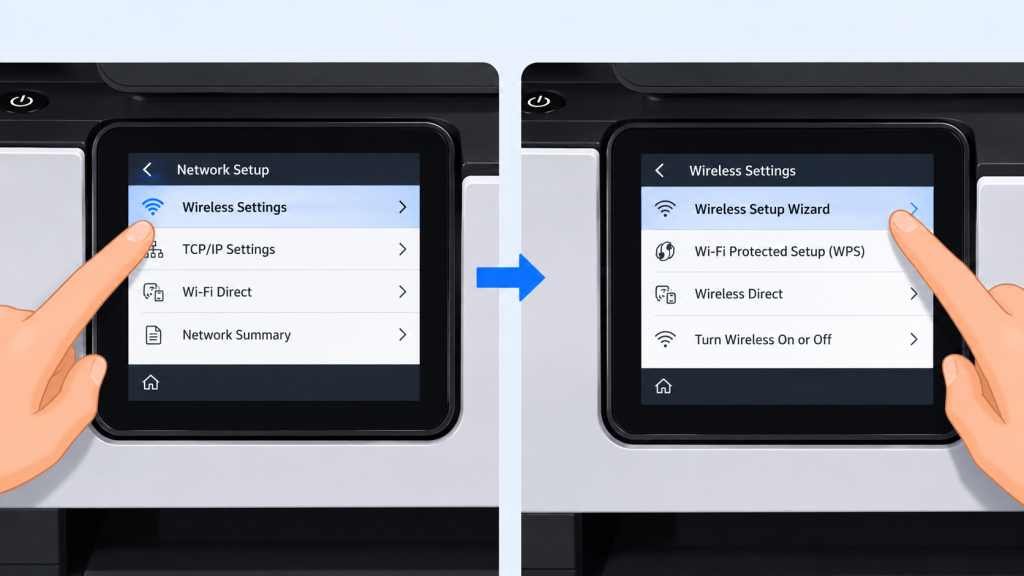
Step 6: Select Wireless Setup Wizard
From the Wireless Settings menu, tap Wireless Setup Wizard.
The Wireless Setup Wizard is designed to guide you through the process of selecting your wireless network and entering its password.
Once you select it, the printer will begin looking for nearby wireless networks.
Step 7: Wait While the Printer Searches for Wi-Fi Networks
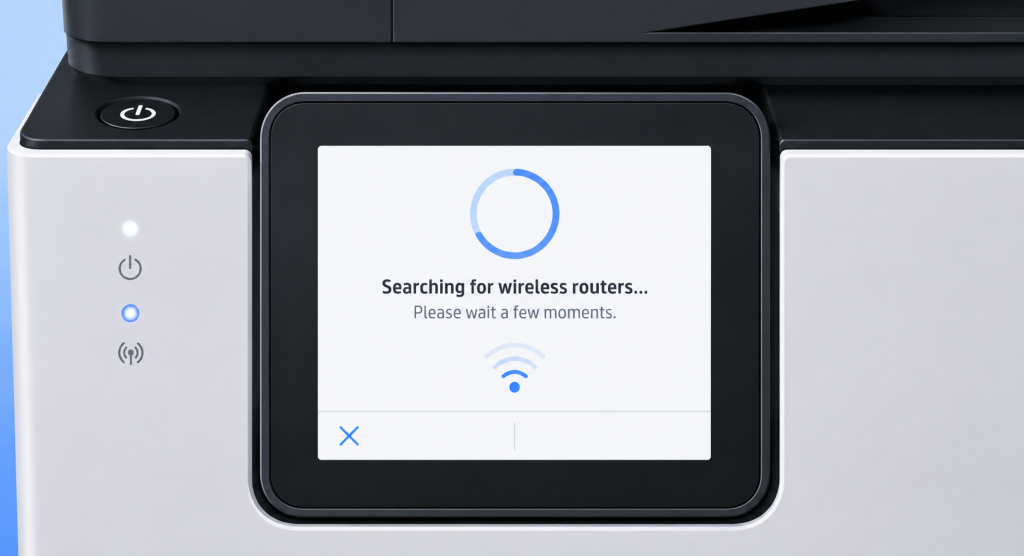
After starting the Wireless Setup Wizard, the printer will scan the surrounding area for available wireless networks.
You may see a message indicating that the printer is searching for wireless routers.
At this point, simply wait a few moments.
Avoid turning off the printer or leaving the setup screen while the search is in progress.
Step 8: Select Your Wi-Fi Network
When the available networks appear on the touchscreen, look through the list for your Wi-Fi network name.
For example, your network might appear as something like:
HomeWiFi
Tap your Wi-Fi network to select it.
Make sure you choose the correct network. If several networks have similar names, double-check the network name before continuing.
What If Your Wi-Fi Network Does Not Appear?
If you don’t see your network in the list, wait a little longer or use the Rescan option if it is available.
Also check that:
- Your router is turned on.
- Your Wi-Fi network is working.
- The printer isn’t too far from the router.
- Your wireless network is visible to other devices.
Step 9: Enter Your Wi-Fi Password
After selecting your wireless network, the printer will ask for your Wi-Fi password.
Use the touchscreen keyboard to enter the password.
This step is important because Wi-Fi passwords are case-sensitive. Carefully check every letter, number, and special character.
For example, an uppercase A is different from a lowercase a.
Take your time when entering the password. A single incorrect character can prevent the printer from connecting.
If the printer provides an option to display the password temporarily, you can use it to check what you have entered before continuing.
Step 10: Tap OK
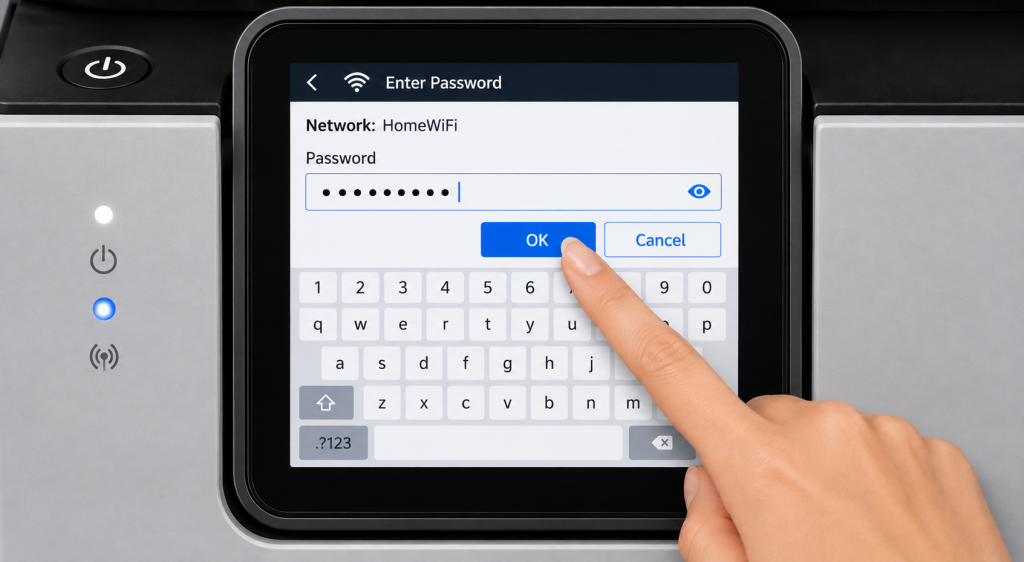
Once you have entered the Wi-Fi password, tap OK on the touchscreen.
The printer will now attempt to connect to the selected wireless network using the password you provided.
Do not turn off the printer while it is attempting to establish the connection.
Step 11: Wait for the Wireless Connection
During this process, you may notice the printer’s blue wireless light flashing.
This is normal during the connection process.
A flashing wireless indicator means the printer is working to establish communication with the wireless network.
Give the printer a few moments to complete the connection.
Depending on your network conditions, the process may take a little time.
Step 12: Confirm the Connection
Once the printer successfully connects, the touchscreen should display a confirmation message.
You may see an indication that the connection was successful and that the printer is connected to your wireless network.
When prompted, tap OK to finish the setup.
At this point, the printer should be connected to your Wi-Fi network.
Step 13: Test Wireless Printing
Your HP OfficeJet Pro 9025 is now ready for wireless printing.
To make sure everything is working correctly, try sending a small print job from your computer, laptop, phone, or tablet.
Make sure the device you are printing from is connected to the same Wi-Fi network as the printer.
If the printer appears in your device’s list of available printers, select it and send a test document or photo.
If the document prints successfully, your wireless setup is complete.
What to Do If the HP OfficeJet Pro 9025 Won’t Connect to Wi-Fi
Sometimes the setup does not work on the first attempt. If your printer cannot connect, don’t worry. There are several basic things you can check.
Check Your Wi-Fi Password
The most common problem during manual Wi-Fi setup is entering the wrong password.
Remember that passwords are case-sensitive. Carefully re-enter the password and make sure there are no extra spaces or incorrect characters.
Restart the Printer and Router
Turn off the printer and your wireless router.
Wait for a short period, then turn the router back on and allow it to completely restart.
After the Wi-Fi network becomes available, turn the printer back on and try the Wireless Setup Wizard again.
Move the Printer Closer to the Router
If the printer is located far away from your router, the wireless signal may be weak.
For troubleshooting purposes, move the printer closer to the router and try the setup again.
Once the connection is established, you can return the printer to its normal location.
Make Sure Your Wi-Fi Is Working
Before troubleshooting the printer, check whether another device can connect to the same Wi-Fi network.
Try connecting your phone or laptop to the network.
If those devices also cannot connect, the problem may be with the router or internet connection rather than the printer.
Check the Wireless Light
Pay attention to the wireless indicator on the printer.
A flashing wireless light during setup can indicate that the printer is still trying to connect. Once the connection is established, the wireless indicator should reflect the printer’s connected status.
HP OfficeJet Pro 9025 Wi-Fi Setup FAQs
Yes. You can connect the HP OfficeJet Pro 9025 directly to your wireless network using the printer’s touchscreen and Wireless Setup Wizard.
From the printer touchscreen, open Settings, select Network Setup, then open Wireless Settings. From there, select Wireless Setup Wizard.
If your network does not appear, make sure the router is turned on and the printer is within range. You can also wait a few moments and use the available Rescan option to search for networks again.
A flashing blue wireless indicator can occur while the printer is attempting to establish a connection with your Wi-Fi network. Give the printer a few moments to complete the connection.
Check the password carefully and enter it again. Pay particular attention to uppercase and lowercase letters, numbers, and special characters.
If you’re still unable to connect, restart the printer and router and then run the Wireless Setup Wizard again.
First, make sure the computer and printer are connected to the same Wi-Fi network.
You can also restart both devices and check your computer’s printer settings. If the printer still doesn’t appear, removing and adding the printer again may help.
Final Thoughts
Connecting the HP OfficeJet Pro 9025 to Wi-Fi is straightforward when you follow the touchscreen prompts carefully.
The basic process is:
Settings → Network Setup → Wireless Settings → Wireless Setup Wizard → Select Your Wi-Fi → Enter Password → OK
Once the wireless connection is successful, your printer can communicate with compatible devices over your home or office network, making it much easier to print without a USB cable.
If you run into a problem during setup, start by checking the Wi-Fi password, restarting the router and printer, and making sure the printer is close enough to the wireless router.
If there’s a particular HP printer model or Wi-Fi problem you’d like us to cover, leave the model number and details in the comments.