Epson ET-2410 WiFi Setup, Not Printing & Troubleshooting – Complete Guide
Complete Setup & Troubleshooting Guide
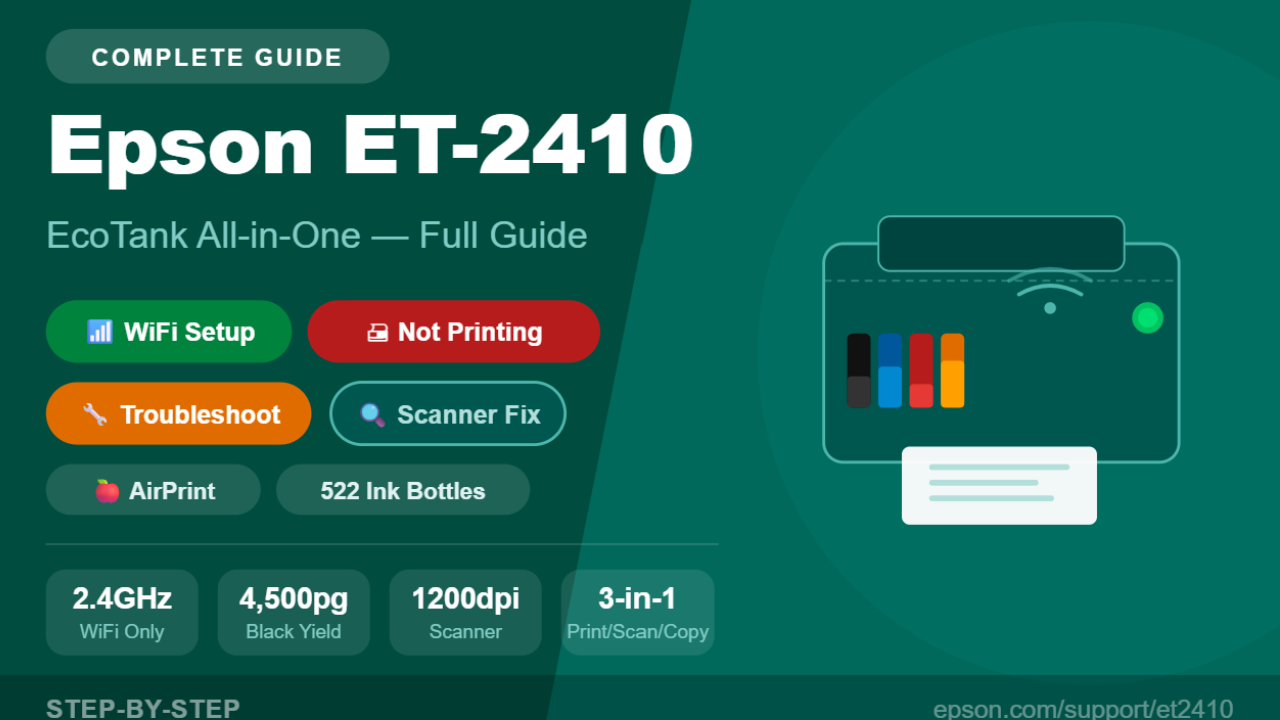
Epson EcoTank ET-2410
WiFi Setup · Not Printing · Scan · Troubleshooting Fixes
Your all-in-one resource for the Epson ET-2410 EcoTank printer — from first-time WiFi setup and ink filling to fixing offline errors, scan problems, and print quality issues.
🖨️
Epson ET-2410 EcoTank All-in-One
The Epson EcoTank ET-2410 is a wireless all-in-one inkjet printer designed for home users who want reliable print, scan, and copy functionality without the ongoing expense of ink cartridges. Powered by Epson’s Micro Piezo Heat-Free Technology and using Epson 522 ink bottles, the ET-2410 delivers up to 4,500 black pages and 7,500 color pages per bottle set — the equivalent of approximately 80 individual ink cartridges. With a high-resolution 1200 dpi flatbed scanner, AirPrint support, Epson Smart Panel compatibility, and WiFi Direct connectivity, the ET-2410 is a well-rounded home printer at an affordable price point.
This guide covers every aspect of using and troubleshooting the ET-2410 — from initial WiFi setup and ink filling to fixing not-printing errors, scan issues, print quality problems, and error light patterns. Whether you’re setting up the ET-2410 for the first time or trying to get it working again after a router change or Windows update, you’ll find the fix here.
⭐ What Makes the ET-2410 Stand Out
📶WiFi + WiFi Direct + USB
🍎AirPrint Compatible
🤖Android Printing / Mopria
🎙️Voice-Activated Printing
🔍1200dpi Flatbed Scanner
🪣Epson 522 EcoTank Ink
⚠️ Important: The ET-2410 supports 2.4GHz WiFi only. It will NOT connect to 5GHz networks. This is the #1 cause of setup failures — always select your 2.4GHz band during setup.
📦
Section 1
What’s in the Box & First-Time Setup
Your Epson ET-2410 box includes the printer unit, four Epson 522 ink bottles (65mL each — Black, Cyan, Magenta, Yellow), a power cord, and a Quick Start guide. No USB cable is included — Epson has removed it from recent EcoTank boxes. Purchase a USB 2.0 Type-A to Type-B cable separately if you need a wired connection.
✅Epson ET-2410 Printer Unit
✅4× Epson 522 Ink Bottles (BCMY)
✅Power Cord (US Plug)
✅Quick Start Guide
✅Warranty Card
❌USB Cable (NOT included)
🪣 First-Time Ink Filling — Key Tips
- Remove ALL blue shipping tape from inside and outside the printer before filling.
- The 522 bottles are color-keyed — each bottle only fits its matching tank color.
- Press the bottle tip firmly into the fill port until it locks. Ink flows in 30–60 seconds.
- Do NOT shake or squeeze the bottle. Do NOT touch the tip after removing the cap.
- Fill all four tanks completely before powering on. Initial setup uses extra ink to prime the printhead.
- After filling, power on and run the ink initialization. This takes 10–20 minutes — do not turn off the printer during this process.
📶
Section 2
Epson ET-2410 WiFi Setup — Step by Step
The ET-2410 has no touchscreen. Setup is done through physical buttons guided by the Epson Smart Panel app (recommended) or the Epson Setup Utility on your computer. Complete the ink filling and initialization before starting WiFi setup.
📱 Method A: Epson Smart Panel App (Easiest — Recommended)
1
Download Epson Smart Panel from the Apple App Store or Google Play. Make sure your phone is connected to your 2.4GHz WiFi network before proceeding.
2
Power on the ET-2410. Press and hold the WiFi button for about 5 seconds until the WiFi indicator light starts flashing.
3
Open Epson Smart Panel → tap “+ Product is not selected” banner → tap No on the pop-up → follow the chat-style setup wizard on screen.
4
Select your 2.4GHz WiFi network name (SSID) from the list → tap Yes → tap Next → enter your WiFi password carefully → tap OK → confirm.
5
Wait 1–2 minutes. The WiFi light will become solid once connected. Smart Panel will confirm the connection and allow you to print a test page.
💻 Method B: Windows or Mac Setup Utility
1
Visit epson.com/support/et2410 → download the Epson Printer Setup Utility for your OS. Run as Administrator.
2
When asked for connection type, select Wireless (WiFi) — not USB. Follow the on-screen prompts.
3
Select your 2.4GHz SSID → enter your WiFi password → the utility sends credentials to the printer wirelessly.
4
Install the full driver package → print a test page from your PC to confirm everything works.
🔘 WPS Push-Button Setup (Fastest Method)
If your router has a WPS button, connect without entering a password:
- On the ET-2410: press and hold the WiFi button for 3 seconds. The WiFi light starts flashing.
- Within 2 minutes, press the WPS button on your router.
- The printer connects automatically — WiFi light turns solid when done. No password needed.
🔗 WiFi Direct Setup (No Router Needed)
- Press and hold the WiFi button and the Network Status (i) button simultaneously until both lights flash.
- Hold the Network Status button for 10 seconds — the printer prints a WiFi Direct password sheet.
- On your device, go to WiFi settings → connect to the “DIRECT-XXXX-ET-2410” network using the printed password.
- Use Epson Smart Panel or Epson iPrint to print directly to the ET-2410 without a router.
The Epson EcoTank ET-2410 is a newer addition to the EcoTank lineup, positioned alongside the ET-2400 as an all-in-one with print, scan, and copy capabilities. Like its siblings, the ET-2410 uses Epson 522 ink — meaning ink costs and yields are identical across the ET-2400, ET-2410, ET-2800, and ET-2803 families. One advantage the ET-2410 has over the ET-2400 is broader mobile printing support, including AirPrint for iPhone and iPad users, making it a popular choice for households with mixed Apple and Android devices. The Epson Smart Panel app is the centerpiece of the ET-2410 experience — it handles setup, maintenance, scanning, ink level checks, and firmware updates all from your smartphone.
❌
Section 3
ET-2410 WiFi Not Connecting — Fixes
WiFi light keeps blinking? Can’t find the printer on your network? Smart Panel shows a connection error? Work through these proven fixes in order — they cover 95% of all ET-2410 WiFi failures:
📡
5GHz Band Problem
The ET-2410 supports 2.4GHz only. Log into your router (192.168.1.1) → split your 2.4GHz and 5GHz into separate SSIDs → connect the printer to the 2.4GHz network exclusively.
🔐
Wrong or Unresponsive Password Field
Update Epson Smart Panel to the latest version. Restart your phone and the printer. If the password field is frozen in the app, reinstall the app or use the PC setup utility instead.
🔄
Router Changed or Replaced
The ET-2410 stores old WiFi credentials and won’t auto-update. Reset the printer’s network settings and redo the full WiFi setup with the new router’s SSID and password.
📶
Weak Signal / Distance
Move the ET-2410 within 15–20 feet of your router for initial setup. Walls, microwaves, and cordless phones interfere with 2.4GHz. A WiFi extender helps if the printer is far from the router.
🔒
Router Security Blocking Printer
Disable AP Isolation in your router’s wireless settings. If MAC address filtering is enabled, add the printer’s MAC address (print a Network Status Sheet: hold the i button 7 seconds).
♻️
Network Settings Reset
Hold the Network Status + WiFi buttons simultaneously while restarting the printer. Hold for 10 seconds until the WiFi light flashes alternately. Release and redo WiFi setup from scratch.
💡 Print a Network Status Sheet:
Hold the Network Status (i) button for 7 seconds to print a sheet showing your printer’s IP address, MAC address, connected SSID, and WiFi signal strength. This is your best diagnostic tool for any connection problem.
🖨️
Section 4
Epson ET-2410 Not Printing — Diagnosis & Fixes
WiFi is connected but nothing prints? Printer shows offline in Windows 10/11 or Mac? Jobs stuck in queue? Here are the top causes with step-by-step fixes for each:
PROBLEM
Printer Shows “Offline” in Windows 10 / 11
- Go to Settings → Bluetooth & devices → Printers & scanners → select ET-2410.
- Click Open print queue → Printer menu → uncheck “Use Printer Offline”.
- Cancel all pending jobs. Right-click ET-2410 → Set as Default Printer.
- Restart Print Spooler: press Win + R → type
services.msc → find Print Spooler → Restart.
PROBLEM
Printer Not Found After Router Change
- Reset WiFi on the printer (hold Network Status + WiFi buttons while restarting, 10 seconds).
- Re-run WiFi setup via Epson Smart Panel or setup utility with new router credentials.
- On your PC: Printers → ET-2410 → Properties → Ports tab → update IP address to match new network IP shown on the Network Status Sheet.
PROBLEM
Print Queue Stuck — Jobs Won’t Clear
- Press Win + R → type
services.msc → find Print Spooler → click Stop.
- Navigate to C:\Windows\System32\spool\PRINTERS → delete all files inside (not the folder).
- Return to services → Start Print Spooler → retry printing.
PROBLEM
Stopped Printing After Windows Update
- Windows Update often replaces the Epson driver with a generic Microsoft driver.
- Uninstall Epson ET-2410 completely from Control Panel → Programs → Uninstall.
- Download the latest driver from epson.com/support/et2410 → install as Administrator.
- Choose Network/WiFi as connection type during driver reinstall.
PROBLEM
Can’t Print from Mac (Offline or Missing)
- Go to System Settings → Printers & Scanners → remove the ET-2410.
- Click the + button to re-add → select the ET-2410 from the list (it must be on same WiFi network).
- If the printer doesn’t appear, download and reinstall the driver from epson.com/support/et2410.
- On macOS 12+, confirm privacy settings allow the Epson software under System Settings → Privacy & Security.
PROBLEM
Printing Blank Pages
- Check all four 522 ink tanks — all colors must have ink for any printing to work.
- Run a Nozzle Check from Epson Smart Panel → Maintenance → Nozzle Check.
- If the nozzle check prints blank, run Head Cleaning (1–2 cycles), then retest.
- Confirm the document you’re printing isn’t actually blank or has white-colored text.
🔍
Section 5
Scanner & Copy Problems — Fixes
The ET-2410’s built-in flatbed scanner supports up to 1200 x 2400 dpi hardware resolution. Scan issues are usually software or network related — here’s how to resolve the most common ones:
🌐
“Unable to Connect to Network Scanner”
Both the printer and computer must be on the same 2.4GHz WiFi network. Open Epson Scan 2 → Settings → confirm the printer’s IP address matches the Network Status Sheet. Reinstall Epson Scan 2 if needed.
❌
Cannot Scan Over Network
Check Windows Firewall — it may be blocking Epson Scan 2. Add Epson Scan 2 as an allowed app in Windows Firewall settings. On Mac, check Privacy settings and allow Epson Scan 2 access.
🖼️
Poor Scan Quality / Blurry Output
Clean the flatbed scanner glass with a soft, lint-free cloth — even small dust spots affect quality. Set resolution to at least 300 dpi for documents, 600 dpi for photos in Epson Scan 2 settings.
📋
Epson Scan 2 Shows Blank Settings Window
This usually means Epson Scan 2 can’t detect the printer. Ensure the printer is on and connected to WiFi. Click Settings → add the printer manually using its IP address from the Network Status Sheet.
📄
Copy Has Faint or Incorrect Colors
Check all four 522 ink tanks — all colors must be present for copying. Run a Nozzle Check and Head Cleaning. Also ensure the original is placed flat and face-down on the scanner glass.
✏️
Scan to Edit Text (OCR)
To scan a document and edit it in Word, use Epson Scan 2 → select Document Mode → set Image Type to Black and White → set resolution to 300 dpi → save as PDF or Word-compatible format.
One common issue specific to the ET-2410 on macOS is the scanner disappearing from the printer list after a system update to macOS Ventura, Sonoma, or Sequoia. This happens because Apple periodically changes its printer and scanner framework, which can break existing Epson driver installations. The reliable fix is to remove the printer from System Settings → Printers & Scanners, restart the Mac, and re-download the latest Epson driver and Epson Scan 2 software from epson.com/support/et2410 matching your exact macOS version. After reinstalling, re-add the printer and the scanner should appear again automatically. Epson regularly releases updated drivers to maintain macOS compatibility.
🎨
Section 6
Print Quality Problems & Ink Fixes
Print quality issues on the ET-2410 are almost always caused by clogged nozzles, low ink, incorrect paper type settings, or a misaligned printhead. Here’s how to diagnose and fix each problem:
👻
Faded / Light Prints
Visually check the transparent ink tank windows — if any tank is low, refill with the correct 522 bottle. Also check driver settings: switch from Draft/Economy to Standard or High quality mode.
〰️
Horizontal Lines / Banding
Clogged printhead nozzles. Go to Epson Smart Panel → Maintenance → Head Cleaning. Run 1–2 cycles, then print a Nozzle Check to verify all rows are clear before printing.
↔️
Printout Has a Slight Slant
This is a paper feed alignment issue. Make sure the paper edge guides in the rear tray are snug against the paper. Fan the paper stack before loading. Run a printhead alignment from Smart Panel → Maintenance.
💧
Prints Blurry or Smeared
Match the paper type in the driver to what’s loaded in the tray. Using the wrong paper type setting causes ink to over-saturate. For glossy paper, allow 30–60 seconds drying time before handling.
🔡
Incorrect Characters Printed
Garbled or incorrect characters usually indicate a driver error or data corruption in the print queue. Clear the print queue, restart the Print Spooler, and reinstall the driver from epson.com/support/et2410.
📐
Incorrect Margins
Check paper size settings in both the application and the printer driver — they must match. Verify the correct paper size is loaded (Letter, A4, etc.) and paper guides are set correctly in the rear tray.
🔍 How to Run a Nozzle Check on ET-2410
- Open Epson Smart Panel → Maintenance → Nozzle Check → Print.
- Examine the printed grid. All rows should be complete with no gaps or missing sections.
- Gaps in any color row = clogged nozzles in that color. Run Head Cleaning for that color.
- Re-run Nozzle Check after cleaning to confirm improvement before printing again.
- If lines persist after 3 cleaning cycles, wait 12 hours then run Power Cleaning from Smart Panel → Maintenance (uses more ink but clears stubborn clogs).
⚠️
Section 7
Error Codes & LED Light Pattern Guide
The ET-2410 has no display screen — it communicates through LED indicator lights on its control panel. Here’s what each light pattern means and how to resolve it:
| Light Pattern / Error |
Meaning |
Fix |
| Power light flashing + Error light on |
Paper jam or out of paper |
Power off. Open all covers. Remove jammed paper carefully. Check for torn paper fragments. Reload and restart. |
| Ink light flashing (one or more) |
Ink tank low or empty |
Refill the indicated color tank with the correct Epson 522 ink bottle. All four colors must be present. |
| WiFi light off |
WiFi not set up or disabled |
Hold WiFi button 5 seconds to enter setup mode. Run WiFi setup via Epson Smart Panel. |
| WiFi light blinking slowly |
Connecting / searching for network |
Wait up to 2 minutes. If it doesn’t go solid, check 2.4GHz band, password accuracy, and router proximity. Retry setup. |
| WiFi + WiFi Direct lights flashing together |
Android device connecting via WiFi Direct |
Normal behavior. Once connected, WiFi Direct light stays solid and WiFi light goes back to normal. |
| All lights flashing simultaneously |
Fatal internal error |
Unplug printer from power for 5 minutes. Reconnect and power on. If persists, contact Epson support. |
| Error code 0x97 |
Internal hardware failure |
Unplug printer from power. Hold Power button 60 seconds. Reconnect power and restart. |
| Maintenance Box Warning |
Waste ink pad nearing end of service life |
Replace the maintenance box. See Epson’s FAQ: “Which maintenance box should I use with this product?” |
| Printer won’t wake from sleep for WiFi job |
Sleep mode / power management issue |
Adjust sleep timer: Smart Panel → Settings → Power Saving. Or press any button on the printer to wake before sending a print job. |
🔧
Section 8
Maintenance Tips to Keep ET-2410 Running Perfectly
With basic preventive care, your ET-2410 can deliver years of reliable performance. These habits prevent the most common hardware and print quality failures before they start:
📅
Print at Least WeeklyPrinting a few pages per week prevents ink from drying in the Micro Piezo nozzles. Even running a color Nozzle Check counts as a maintenance print.
🪣
Only Use Epson 522 InkThird-party inks may permanently clog the Heat-Free printhead and void your warranty. Always use genuine Epson 522 EcoTank ink bottles for best results and longevity.
🧹
Clean Scanner Glass MonthlyUse a soft, lint-free cloth to wipe the flatbed scanner glass. Fingerprints and dust reduce scan quality noticeably. Never use paper towels, solvents, or alcohol.
💾
Keep Firmware UpdatedOpen Epson Smart Panel regularly and check for firmware updates. Updated firmware improves WiFi stability, fixes driver bugs, and ensures compatibility with new OS versions.
🌡️
Store in Stable EnvironmentAvoid direct sunlight, extreme cold, and high humidity. Ideal operating temperature is 50°F–95°F (10°C–35°C). Damp environments cause paper jams and smearing.
📄
Use Quality PaperFan paper before loading to prevent multi-feed jams. Use 20lb (75gsm) or heavier paper. Avoid damp or curled paper. Store paper in sealed packaging to prevent moisture absorption.
🔄
How to Reset Epson ET-2410 to Factory / Network Defaults
Use only when all other troubleshooting steps have failed.
A network reset clears all WiFi settings, IP configuration, and stored credentials. After resetting, you will need to go through the full WiFi setup again. This resolves persistent connection failures that can’t be fixed by any other method.
1
Ensure the printer is powered ON and in idle/ready state — not printing or showing an error.
2
Press and hold the Network Status (i) button and the WiFi button simultaneously while powering the printer off and back on.
3
Continue holding both buttons for approximately 10 seconds until the WiFi indicator flashes alternately. Release both buttons.
4
All network settings are now cleared. Re-run WiFi setup from Section 2. Reinstall the driver on your PC/Mac if needed.
The Epson EcoTank ET-2410 is a smart long-term investment for any home user who prints regularly. The combination of Micro Piezo Heat-Free Technology, the Epson 522 ink system, and AirPrint support makes it one of the most versatile budget all-in-one printers available today. The 522 ink bottles represent outstanding value — a single set can last up to two years under typical home use and print thousands more pages than traditional cartridge printers at a fraction of the cost per page. The vast majority of issues users encounter with the ET-2410 are related to WiFi configuration (almost always the 5GHz band), driver conflicts after OS updates, or dried nozzles from infrequent use — all of which are fully covered and fixable with the steps in this guide. Keep this page bookmarked for quick reference whenever your ET-2410 needs attention.
📋 Quick Reference — ET-2410 Cheat Sheet
Find your fix fast
WIFI WON’T CONNECT
2.4GHz only • Check password • Update Smart Panel • Move closer to router • Reset network settings
PRINTER OFFLINE
Uncheck “Use Printer Offline” • Clear queue • Restart Print Spooler • Set as Default Printer
SCANNER NOT FOUND
Same WiFi network • Reinstall Epson Scan 2 • Add printer IP manually in Scan 2 settings
FADED / LINES
Check 522 ink levels • Run Nozzle Check • Head Cleaning 1–3 cycles • Power Cleaning if needed
DRIVER ISSUES
Uninstall fully • Restart • Download from epson.com/support/et2410 • Reinstall as Admin (WiFi type)
LAST RESORT
Hold Network Status + WiFi while restarting → 10 sec → redo WiFi setup → reinstall driver
Still need help? Epson Support: 1-562-276-4382 | epson.com/support/et2410
This guide is for informational purposes only. Epson ET-2410 and EcoTank are trademarks of Seiko Epson Corporation. Always refer to your official Epson documentation for warranty-related service. Ink yields based on Epson ISO/IEC 24712 methodology — actual yields vary based on usage conditions.