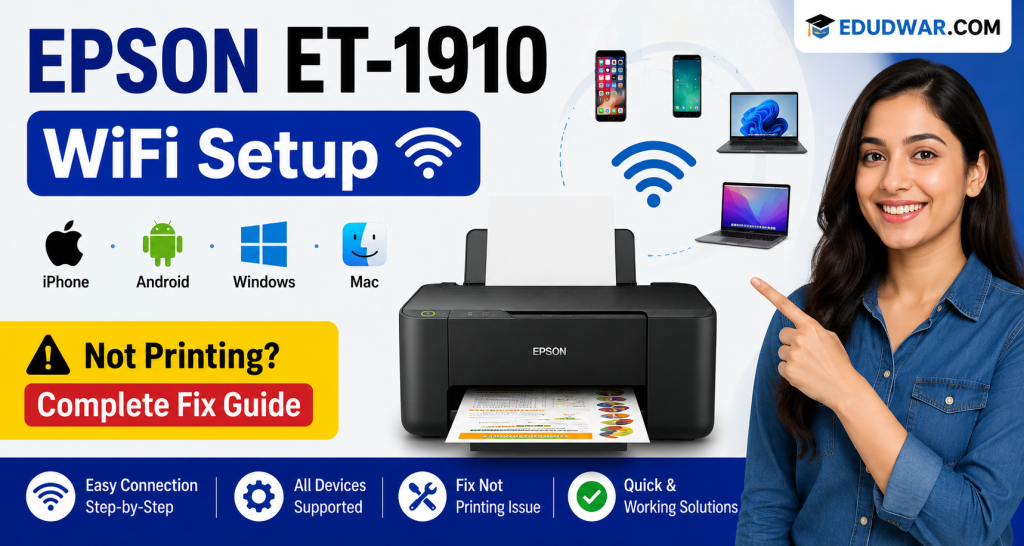

Epson ET-1910 WiFi Setup
iPhone · Android · Windows · Mac
Not Printing? Complete Fix Guide
The complete Epson ET-1910 guide — WiFi setup on every device, not connecting to WiFi, not printing, and full troubleshooting for all platforms.
The Epson EcoTank ET-1910 is a compact, print-only EcoTank model designed for home users who want low-cost per-page printing without a scanner or copier taking up desk space. Like all EcoTank printers, it uses refillable ink tanks instead of cartridges — delivering significant long-term cost savings. However, getting it set up on WiFi and connected across different devices can be confusing, and print quality or connection problems can arise if the setup is not done correctly the first time.
This guide covers everything you need to know about the Epson ET-1910: how to set it up on WiFi from an iPhone, Android phone, Windows PC, and Mac; what to do when it won’t connect to WiFi; how to fix it when it stops printing; and answers to the most commonly asked questions about this specific model. Every fix in this guide is ET-1910-specific and written to be followed without any technical background.
Set Up the Epson ET-1910 WiFi on Your Device
iPhone / iPad
iOS setup via Epson Smart Panel
Android
Android setup via Epson Smart Panel
Windows 10 / 11
Driver install and WiFi connection
MacBook / Mac
macOS driver and AirPrint setup
Know Your Printer Before You Start
The Epson ET-1910 is a print-only EcoTank model — it does not scan or copy. It connects via 2.4GHz WiFi only — it does not support 5GHz. It uses the Epson Smart Panel app for mobile setup and printing (iOS and Android). It is compatible with AirPrint on iPhone and iPad, and with Mopria Print Service on Android. For PC printing, install the Full Feature Driver from epson.com/support. The ET-1910 uses Epson 522 EcoTank ink bottles — do not use any other ink series.
The ET-1910 does not support 5GHz WiFi. If your router broadcasts both bands under the same name, the ET-1910 may fail to connect. You must ensure it connects to the 2.4GHz band only during setup.
Download Epson Smart Panel (free, iOS and Android) before starting setup. This is the recommended and fastest way to connect the ET-1910 to WiFi and set it up for mobile printing on both iPhone and Android.
Before starting WiFi setup on any device, complete the ET-1910’s physical setup first. Remove all packaging tape from inside the printer, fill the four ink tanks using the Epson 522 ink bottles (black, cyan, magenta, yellow) above the minimum line, load paper, and power on. The printer will run an initial ink charging process that takes approximately 10 minutes — do not turn off during this time. Only begin WiFi setup after the printer has completed initialisation and the status light is solid (not blinking).
How to Connect the Epson ET-1910 to WiFi
⚠️ Do This First on Your Router — Prevents 90% of Setup Failures
Before starting setup on any device: log into your router admin panel and confirm the WiFi security is set to WPA2 or WPA2/WPA3 Mixed (not WPA3-only). Also give your 2.4GHz and 5GHz bands different names so the ET-1910 can only see and connect to the 2.4GHz network. These two changes resolve the majority of ET-1910 WiFi setup failures before they happen.
WiFi Setup on iPhone / iPad (iOS)
Using Epson Smart Panel — recommended method for iPhone
Download Epson Smart Panel from the App Store
Open the App Store on your iPhone or iPad. Search for “Epson Smart Panel” and download the free official Epson app. This is the primary setup and printing app for the ET-1910 on iOS.
App Store → Epson Smart Panel → GetConnect your iPhone to your 2.4GHz WiFi network
Make sure your iPhone is connected to the same 2.4GHz WiFi network you want the ET-1910 to use. The printer must join the same network as your iPhone for the setup to work. If your router has separate 2.4GHz and 5GHz names, select the 2.4GHz one on your iPhone during setup.
Open Epson Smart Panel and tap Set Up Printer
Open Epson Smart Panel. Tap the “+” icon or “Set Up Printer”. Select Epson ET-1910 from the printer list. Follow the in-app instructions — the app will guide you through connecting the ET-1910 to your WiFi network step by step.
Follow the app’s WiFi connection prompts
The app will ask you to temporarily connect your iPhone directly to the printer’s own WiFi signal. Allow this when prompted — your iPhone will switch temporarily to the printer’s network. The app then transfers your home WiFi credentials to the printer automatically.
Confirm connection and print a test page
Once connected, the ET-1910’s WiFi light will turn solid blue. In Epson Smart Panel tap Print and select any document or photo to print a test page. For AirPrint: in any iOS app tap the Share icon → Print → select ET-1910 from the printer list.
Share → Print → Epson ET-1910 → PrintWiFi Setup on Android
Using Epson Smart Panel — recommended method for Android
Download Epson Smart Panel from Google Play
Open Google Play Store on your Android device. Search for “Epson Smart Panel” and install the free official app. Also ensure Mopria Print Service is installed — it is pre-installed on most Android devices but search for it in Play Store if you cannot find it.
Google Play → Epson Smart Panel → InstallEnable Location permission for Epson Smart Panel
Android requires Location permission to be enabled for apps that scan for WiFi networks. When prompted by Epson Smart Panel, grant Location permission. Without this permission the app cannot discover the printer’s WiFi signal during setup.
Open Smart Panel and set up the ET-1910
Open Epson Smart Panel. Tap “Set Up” or the “+” button. Select Epson ET-1910. Follow the on-screen setup wizard — the app will search for the printer’s own WiFi signal and guide you through transferring your home network credentials to the printer.
Allow your phone to temporarily connect to printer WiFi
The Smart Panel setup will ask to connect your Android device directly to the ET-1910’s temporary WiFi signal. Tap Allow or Connect when your Android prompts about the network change. This is normal — the app uses this direct connection to send your home WiFi details to the printer.
Print from Android using Epson Smart Panel or Mopria
Once connected, print directly from Epson Smart Panel. For printing from other Android apps: tap the menu or share → Print in any app and select the ET-1910 from the printer list. Mopria Print Service enables printing from Chrome, Gmail, Google Docs, and any other print-capable Android app.
WiFi Setup on Windows 10 & 11
Driver install and WiFi connection for Windows PCs
Connect ET-1910 to WiFi first using the printer panel
Before installing the Windows driver, connect the ET-1910 to your WiFi network using its own control panel: press the WiFi button until the WiFi and Status lights blink. Then press the WPS button on your router within 2 minutes. Both lights will turn solid when connected successfully.
ET-1910 WiFi button → Router WPS button → lights solidDownload the ET-1910 Full Feature Driver
On your Windows PC, visit epson.com/support. Search “ET-1910” and select your Windows version (Windows 10 or Windows 11). Download the Full Feature Driver and Software package — not the basic driver only.
epson.com/support → ET-1910 → Full Feature Driver → DownloadRight-click installer and Run as administrator
Locate the downloaded installer file. Right-click → Run as administrator. Click Yes on the UAC prompt. The Epson installer requires administrator privileges — running without elevation causes a silent install failure.
Select WiFi connection during setup wizard
When the installer asks for connection type — select Wi-Fi. The wizard will search for the ET-1910 on your network. If the printer was connected to WiFi in Step 1, it should appear in the list. Select it and complete the installation.
Print a test page to confirm
After installation, go to Settings → Bluetooth & devices → Printers & scanners. Click Epson ET-1910 and select Print a test page. Confirm the page prints correctly before your first real print job.
Settings → Printers → ET-1910 → Print test pageWiFi Setup on MacBook / Mac (macOS)
Driver install and AirPrint setup for macOS Ventura, Sonoma & earlier
Connect ET-1910 to WiFi via WPS or Smart Panel first
Connect the ET-1910 to your WiFi network before touching the Mac setup. Use the WPS button method (press ET-1910 WiFi button then router WPS button within 2 minutes) or use the Epson Smart Panel app on your iPhone to complete the WiFi connection first.
Download the Mac driver from epson.com/support
Visit epson.com/support on your Mac. Search “ET-1910” and select your macOS version. Download the Epson ET-1910 Printer Driver for macOS. For macOS Ventura and Sonoma, confirm you download the correct updated version.
epson.com/support → ET-1910 → macOS → DriverAllow the installer in Privacy & Security if blocked
If macOS Gatekeeper blocks the installer, go to System Settings → Privacy & Security and scroll down to find the Epson entry. Click “Allow Anyway”. Re-run the installer and follow the on-screen steps to complete installation.
System Settings → Privacy & Security → Allow AnywayAdd the ET-1910 in Printers & Scanners
Go to System Settings → Printers & Scanners → tap “+”. The ET-1910 should appear in the list if it is connected to the same WiFi as your Mac. Select it and click Add. Choose the Epson driver (not AirPrint) for full functionality.
System Settings → Printers & Scanners → + → Add ET-1910Print a test page to confirm
Open any document on your Mac and press Cmd+P. Select Epson ET-1910 from the printer dropdown and click Print. Confirm the page prints correctly. You can also use AirPrint — the ET-1910 will appear automatically in any app’s print dialog on the same WiFi network without needing the driver installed.
Once the ET-1910 is connected to WiFi and printing from your main device, the most important follow-up step is to assign it a static IP address in your router. The ET-1910 — like most home printers — receives a dynamic IP address from the router via DHCP, which can change after every router restart. When the IP changes, your PC or Mac loses the connection to the printer and it shows as offline. A reserved IP in the router admin panel takes two minutes to set up and permanently prevents this recurring problem.
Epson ET-1910 Not Connecting to WiFi — Causes & Fixes
5GHz Band Interference — ET-1910 is 2.4GHz Only
The ET-1910 does not support 5GHz WiFi. If your router broadcasts both bands under the same SSID name, the printer may attempt 5GHz and fail silently every time. Separating the bands in your router settings with different names is the most important single fix for ET-1910 WiFi setup failures.
WPA3-Only Router Security
The ET-1910 does not support WPA3-only security mode. Routers set to WPA3-only silently reject the ET-1910’s connection attempt — the setup wizard appears to accept the password but then reports a connection error. Changing to WPA2 or WPA2/WPA3 Mixed immediately resolves this.
Previous Failed Setup Data Stored on Printer
If a previous WiFi setup attempt failed partway through, the printer stores the incomplete credentials and blocks fresh attempts with those same details. Resetting the ET-1910’s network settings clears this and allows a clean retry.
Printer Too Far from Router During Setup
The ET-1910’s WiFi authentication requires a stronger signal than normal printing. Setup failures caused by distance are common — the printer may appear to be in range for printing but the authentication handshake fails at that signal level.
Network Name or Password Contains Special Characters
WiFi network names or passwords containing certain special characters — particularly quotes, apostrophes, or some Unicode characters — can cause the ET-1910’s WiFi setup to fail. Temporarily renaming the network to a simple alphanumeric name resolves this.
ET-1910 WiFi Not Connecting — Fix Protocol
Follow these steps in order until WiFi connects
Reset the ET-1910 network settings
Hold the printer’s WiFi button for 3 seconds until the lights flash. This clears all stored network data. On some ET-1910 firmware versions: hold the WiFi button and Power button simultaneously for 3 seconds to reset network settings to factory default.
Hold WiFi button 3 sec → lights flash = reset confirmedSeparate router bands and set security to WPA2
In your router admin panel: give the 2.4GHz and 5GHz bands different names. Set security to WPA2 or WPA2/WPA3 Mixed. Disable MAC address filtering if enabled. Set 2.4GHz channel manually to 1, 6, or 11.
Move printer within 1 metre of router for setup
Temporarily place the ET-1910 directly next to the router. The authentication handshake during initial WiFi setup requires a much stronger signal than everyday printing — proximity eliminates signal as a failure variable.
Try WPS push button connection
On the ET-1910 hold the WiFi button for 3 seconds until lights blink in WPS pattern. Then within 2 minutes press the WPS button on your router. Lights will turn solid when connected. WPS bypasses password entry entirely and often succeeds when the wizard method fails.
ET-1910 WiFi button (3 sec) → Router WPS button → solid lightsTest with a mobile hotspot
Create a mobile hotspot on your phone with a simple name (letters and numbers only, no special characters) and connect the ET-1910 to it via Epson Smart Panel. If it connects — the problem is your home router’s settings, not the printer. If it fails — the printer’s WiFi module may be faulty.
For users who successfully connect the ET-1910 to WiFi but find it goes offline frequently — particularly after the router restarts — the permanent solution is to assign the printer a reserved IP address in the router’s DHCP settings. Every time the router restarts without a reserved IP, it may assign the ET-1910 a new address. Any PC or Mac that had the old IP stored in its printer driver will then show the printer as offline until the driver is updated or the printer is removed and re-added. A reserved IP costs nothing and takes under two minutes to configure in any modern router’s admin panel.
Epson ET-1910 Not Printing — Fix Guide
💡 Run Nozzle Check Before Any Other Fix
Print a nozzle check pattern first: hold the printer’s Paper button for 5 seconds while the printer is idle to print a nozzle check sheet. If lines are missing — you have a nozzle clog (fix with head cleaning). If the pattern is perfect — the issue is connection, driver, or settings rather than ink.
Power Cycle Printer and Router
Turn off the ET-1910 and unplug the router. Wait 60 seconds. Power router on first, wait 30 sec, then power on the printer. Allow full reconnection before sending any print job.
Clear the Print Queue (Windows)
Press Win+R → control printers. Right-click ET-1910 → See what’s printing → cancel all jobs. Then services.msc → Print Spooler → Restart. Clears stuck jobs blocking all printing.
Disable “Use Printer Offline” (Windows)
In control printers, right-click ET-1910. If “Use Printer Offline” has a tick — click to remove it. This setting forces the printer offline regardless of its actual connection status.
Update Printer Port IP Address
Print a network status sheet (hold WiFi button 10 sec to print). Go to Printer Properties → Ports → Configure Port — update the IP to match the status sheet. IP mismatch is the most common “offline” cause.
Run Head Cleaning Cycle
If nozzle check shows gaps: hold Paper + Power buttons together for 5 seconds to start a cleaning cycle on the ET-1910. Or on Windows run Epson Printer Utility → Head Cleaning. Repeat up to 3 times.
Check Ink Tank Levels
Check all four ink tanks are above the minimum line. Refill with genuine Epson 522 EcoTank ink bottles as needed. Any tank below minimum allows air into the feed system causing blank output.
Assign Static IP to ET-1910
In your router admin panel, reserve a fixed IP for the ET-1910. Permanently prevents offline errors caused by IP changes after every router restart — the most common recurring issue on this model.
Reinstall the ET-1910 Driver
Uninstall all Epson software from Settings → Apps. Download the latest Full Feature Driver from epson.com/support → ET-1910. Reinstall as administrator and select WiFi connection when prompted.
Reset Printing System (Mac)
On Mac: System Settings → Printers & Scanners → right-click list → Reset printing system. Re-add the ET-1910 after reset. Clears any cached printer state causing “not printing” on macOS.
Check App Permission (iPhone / Android)
On iPhone: Settings → Epson Smart Panel → Local Network → Allow. On Android: Settings → Apps → Epson Smart Panel → Permissions → Location → Allow. Missing permissions prevent the app from finding the printer.
Keep Your Epson ET-1910 Running Reliably
Epson ET-1910 — FAQs
How do I connect the Epson ET-1910 to WiFi without a WPS button on my router?
If your router does not have a WPS button, use the Epson Smart Panel app on your iPhone or Android to set up the ET-1910 WiFi connection. The Smart Panel method does not require WPS — it uses a direct device-to-printer connection to transfer your WiFi credentials. This is the recommended method for routers without WPS. Alternatively, if you have a Windows or Mac PC, you can run the Full Feature Driver installer from epson.com/support and select “Wireless Connection Setup” during installation, which walks you through entering your network name and password manually.
Does the Epson ET-1910 work with iPhone without downloading an app?
Yes — the ET-1910 supports Apple AirPrint, which is built into every iPhone and iPad. Once the ET-1910 is connected to the same WiFi network as your iPhone, it will appear automatically in the printer list in any iOS app when you tap Share → Print. You do not need to install any app to print via AirPrint. However, installing Epson Smart Panel gives you additional features including ink level monitoring, print queue management, and the ability to print photos and documents directly from the app.
The ET-1910 WiFi light is blinking — what does it mean?
A blinking WiFi light on the Epson ET-1910 indicates the printer is attempting to connect to WiFi but has not yet established a stable connection. A slow blink typically means the printer is in setup mode waiting to receive WiFi credentials. A fast blink indicates a connection error — the printer received credentials but cannot authenticate. For a fast blink, reset the network settings (hold WiFi button 3 seconds) and retry the setup from scratch, ensuring WPA2 security and 2.4GHz band separation in your router settings.
Can I use the Epson ET-1910 with a USB cable instead of WiFi?
Yes — the ET-1910 has a USB Type-B port that allows direct connection to a Windows PC or Mac. For USB printing, download the Full Feature Driver from epson.com/support and select USB connection during installation. USB is also useful for completing the initial driver installation if you plan to use WiFi long-term — install via USB first to confirm the driver works, then switch to WiFi connection through the Epson printer settings.
How do I print from an Android phone to the Epson ET-1910?
There are two ways to print from Android to the ET-1910. First, install Epson Smart Panel from the Google Play Store — this allows direct printing of photos, documents, and web content from within the app. Second, use Mopria Print Service (pre-installed on most Android devices) — this enables printing from any Android app that supports printing (Chrome, Gmail, Google Docs, etc.) by tapping the menu or share icon and selecting Print, then choosing the ET-1910 from the printer list. Both require the ET-1910 to be on the same WiFi network as your Android device.
My Epson ET-1910 goes offline every time I restart my router — how do I fix this permanently?
This is the most commonly reported ongoing issue with the ET-1910. The printer receives a new IP address from the router every time it restarts (DHCP), and the Windows or Mac driver is still pointing to the old IP address — causing the offline error. The permanent fix is to log into your router admin panel and assign a reserved (static) IP address to the ET-1910. The printer’s MAC address is printed on the label on the bottom of the printer — use this to create the reservation. Once the IP is fixed, update the port in Windows Printer Properties to match, and the offline issue will not recur.
What ink does the Epson ET-1910 use?
The Epson ET-1910 uses Epson 522 EcoTank ink bottles — black (T522120), cyan (T522220), magenta (T522320), and yellow (T522420). These are the only compatible ink bottles for this model. Do not use Epson 502, 512, or any other EcoTank series ink — incorrect ink bottles are a different formulation and using them can damage the printer’s ink feed system and void the warranty.
When to Contact Epson Support
If all fixes have been applied — including nozzle check, head cleaning, driver reinstall, and static IP assignment — and the ET-1910 is still not connecting or not printing, contact Epson support. Situations requiring professional service: