Epson ET-2650 WiFi Setup, Not Printing & Troubleshooting – Complete Guide
Complete Setup & Troubleshooting Guide
Epson EcoTank ET-2650
WiFi Setup · Not Printing · Scan · Troubleshooting Fixes
Your complete resource for the Epson Expression ET-2650 EcoTank — from first-time WiFi setup and LCD navigation to fixing offline errors, scan problems, print quality issues, and error codes.
🖨️
Epson ET-2650 Expression EcoTank All-in-One
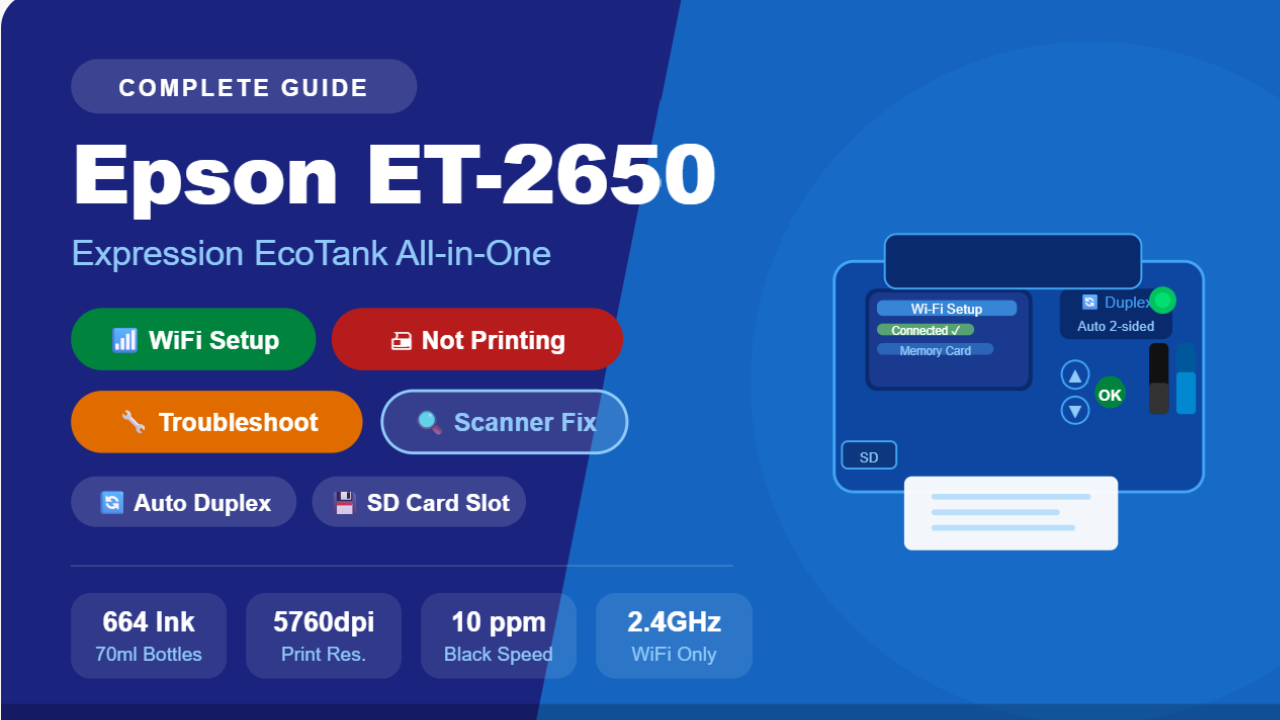
The Epson Expression EcoTank ET-2650 is a feature-rich wireless all-in-one printer that represents a significant upgrade over the ET-2550. While both models use the Epson 664 ink bottle system, the ET-2650 adds automatic two-sided (duplex) printing, a built-in SD/SDHC/SDXC memory card slot, a slightly larger 1.44″ TFT color LCD, and a faster print speed of 10 ppm for black documents. It also supports AirPrint, Google Cloud Print, Mopria, Epson iPrint, and WiFi Direct — making it one of the most connectivity-rich home printers Epson released in its era.
The ET-2650 delivers up to 4,000 black pages and 6,500 color pages per ink set — the equivalent of approximately 20 standard cartridge sets — and saves up to 80% on ink compared to cartridge-based printers. This guide covers everything: first-time WiFi setup via the LCD panel, fixing WiFi connection failures, resolving not-printing errors, scanner troubleshooting, print quality fixes, and error code reference.
⭐ ET-2650 Standout Features
🔄Auto duplex — 2-sided printing
💾SD card slot — print without a PC
🖥️1.44″ TFT color LCD panel
🍎AirPrint — iOS printing support
📶WiFi Direct — no router needed
📧Email printing — forward to print
⚠️ Critical: The ET-2650 uses Epson 664 ink bottles only (70ml, T664 series). Do NOT use 502, 522, or any other series — wrong ink will permanently damage the printer. Also: supports 2.4GHz WiFi only — not compatible with 5GHz networks.
📦
Section 1
What’s in the Box & First-Time Setup
Your ET-2650 box includes the printer unit, four Epson 664 ink bottles (70ml — Black, Cyan, Magenta, Yellow), a power cord, a CD-ROM for software setup, and a Quick Start guide. Note: a USB cable is NOT included in some regional versions — check your box and purchase a USB 2.0 Type-A to Type-B cable separately if needed.
✅Epson ET-2650 Printer Unit
✅4× Epson 664 Ink Bottles (BCMY)
✅Power Cord
✅CD-ROM Setup Software
✅Quick Start Guide / Manual
⚠️USB Cable — varies by region
🍶 First-Time Ink Filling — Epson 664 Tips
- Remove ALL orange shipping clips and blue tape — inside and outside the printer.
- The 664 bottles are color-coded — each bottle fits only its matching tank color.
- Remove the bottle cap, then unscrew the inner protective seal. Invert the bottle into the tank fill port — do not squeeze.
- Let gravity fill the tank (30–60 seconds per color). Do NOT overfill past the maximum line.
- Replace the ink tank cap securely. Repeat for all four colors.
- Power on and allow the printer to run the ink initialization (10–20 minutes). Do not power off during this process — it permanently primes the printhead.
💡 Auto Duplex Tip:
The ET-2650 supports automatic two-sided printing — enable it in the printer driver under Two-Sided Printing → Automatic. This saves paper and ink for long documents. For best duplex results, use 24lb (90gsm) or heavier paper to prevent show-through.
📶
Section 2
Epson ET-2650 WiFi Setup — Step by Step
The ET-2650 has a built-in 1.44″ TFT color LCD with arrow and OK buttons — giving you three ways to set up WiFi: via the LCD Setup Wizard, via WPS push-button, or via the Epson iPrint app. All methods work well; the LCD wizard is most common for first-time setup.
🖥️ Method A: LCD WiFi Setup Wizard (Most Common)
1
Power on the ET-2650. On the color LCD, press the Home button (house icon) to go to the main menu.
2
Use the arrow buttons to select Setup → press OK. Select Network Settings → press OK.
3
Select Wi-Fi Setup → press OK. Then select Wi-Fi Setup Wizard → press OK.
4
The printer scans and lists available networks on the LCD. Use arrow buttons to select your 2.4GHz WiFi network name (SSID) → press OK.
5
Enter your WiFi password character by character using arrow buttons → press OK after each character → select Done when the full password is entered.
6
Select Yes to confirm → wait 1–2 minutes. The LCD displays Connection Successful and the WiFi indicator light turns solid green when connected.
7
Install the printer driver: visit epson.com/support/et2650 → download the full software package for your OS → run as Administrator → print a test page to confirm.
🔘 Method B: WPS Push-Button (Fastest — No Password Entry)
- On LCD: Setup → Network Settings → Wi-Fi Setup → Push Button (WPS) → OK.
- Within 2 minutes, press the WPS button on your router.
- The ET-2650 connects automatically. LCD shows Connection Successful — no password required.
🔗 Method C: WiFi Direct (No Router Needed)
- On LCD: Setup → Network Settings → Wi-Fi Direct Setup → press OK to enable.
- The LCD displays the WiFi Direct SSID (starting with “DIRECT-“) and password.
- On your device: connect to that network using the displayed password.
- Use Epson iPrint or AirPrint to print directly to the ET-2650.
📱 Method D: Epson iPrint App (iOS & Android)
The ET-2650 is compatible with the Epson iPrint app (not Smart Panel — that’s for newer models). Download Epson iPrint from the App Store or Google Play → open the app → tap Printer is not selected → follow the guided setup. Ensure your phone is on the same 2.4GHz WiFi network before starting.
⚠️ Password Entry Warning:
Entering a long WiFi password via the LCD arrow buttons is tedious. Each character requires multiple button presses. Consider temporarily simplifying your WiFi password to a shorter one for setup, then changing it back on your router once the printer is connected.
The Epson ET-2650 represents the peak of the original EcoTank generation that launched around 2016. Its automatic duplex printing — a feature absent from the ET-2550 — makes it significantly more practical for home office use, as two-sided printing can cut paper costs in half for long documents. The SD card slot is another genuinely useful addition: it allows you to print photos directly from a memory card without a computer, which is particularly convenient for printing holiday photos or documents from a camera’s memory card. These features, combined with the same 664 ink system as the ET-2550, made the ET-2650 the recommended EcoTank model for home office users during its retail availability period.
❌
Section 3
ET-2650 WiFi Not Connecting — Fixes
WiFi light blinking? LCD shows “Connection Failed”? Can’t find the printer on your network? Here are the top fixes for every ET-2650 WiFi connection failure:
📡
5GHz Network Issue
The ET-2650 supports 2.4GHz WiFi only. Log into your router (192.168.1.1) → separate your 2.4GHz and 5GHz SSIDs → connect the printer to the 2.4GHz network. This fixes the majority of connection failures.
⌨️
LCD Password Entry Error
A single wrong character causes connection failure. Clear network settings (Setup → Network Settings → Restore Default Settings) and re-enter the password very carefully. Note: password is case-sensitive.
🔄
New Router / Changed Network
After getting a new router or changing your WiFi password, the ET-2650 won’t auto-reconnect. Reset network settings and redo the WiFi Setup Wizard with the new router’s SSID and password.
📶
Poor WiFi Signal
Move the ET-2650 within 15–20 feet of your router during initial setup. The printer’s WiFi module struggles with thick walls or long distances. Use a WiFi range extender to maintain a stable signal after setup.
🔒
Router Security Blocking
Disable AP Isolation in your router’s wireless settings. If MAC address filtering is enabled, add the printer’s MAC address (found in Setup → Network Settings → Network Status → print).
🧱
PC Firewall Blocking Setup
During driver installation, your PC firewall may block the Epson setup utility from detecting the printer. Temporarily disable Windows Defender Firewall or any third-party antivirus firewall, complete setup, then re-enable.
💡 Print a Network Status Sheet:
On the LCD: Setup → Network Settings → Network Status → Wi-Fi Status → OK (Print). This sheet shows your printer’s IP address, MAC address, connected SSID, signal strength, and connection status — your best diagnostic tool for any WiFi problem.
🖨️
Section 4
Epson ET-2650 Not Printing — Diagnosis & Fixes
Connected to WiFi but nothing prints? Printer shows offline? Print jobs stuck? Here are the most common ET-2650 printing failures with step-by-step solutions:
PROBLEM
Printer Shows “Offline” in Windows 10 / 11
- Go to Control Panel → Devices and Printers → right-click ET-2650 → See what’s printing.
- Click Printer in the menu bar → uncheck “Use Printer Offline”.
- Cancel all pending print jobs. Right-click ET-2650 → Set as Default Printer.
- Restart Print Spooler: Win + R →
services.msc → Print Spooler → Restart.
PROBLEM
Print Jobs Stuck in Queue
- Win + R → type
services.msc → find Print Spooler → click Stop.
- Navigate to C:\Windows\System32\spool\PRINTERS → delete all files inside (keep the folder).
- Return to services → Start Print Spooler → retry printing.
PROBLEM
Driver Broken After Windows / macOS Update
⚠️ ET-2650 Note: Epson may have limited driver updates for this older model on newer OS versions.
- Fully uninstall Epson software from Control Panel → Programs → Uninstall.
- Restart your computer.
- Download the latest available driver from epson.com/support/et2650 for your OS version.
- Install as Administrator → select WiFi/Network connection type.
- If no driver available for your OS: Mac users use AirPrint; Windows users try Mopria Print Service.
PROBLEM
Duplex (Two-Sided) Printing Not Working
- In the print dialog: click Printer Properties → find 2-Sided Printing → select Automatic.
- Ensure the paper type is supported for duplex — avoid very thin paper (under 20lb/75gsm).
- If duplex jams: use heavier paper and make sure sheets are not damp or curled.
- Duplex only works on Letter, A4, and Legal paper sizes — not envelopes or photo paper.
PROBLEM
Cannot Print from SD Card
- Ensure the SD card is formatted as FAT32 (not exFAT or NTFS).
- Supported formats: SD, SDHC, SDXC (miniSD and microSD require an adapter).
- On the LCD: tap Memory Card from the home menu → select the photo → Print.
- If card not recognized: remove and reinsert firmly. Try a different card to confirm the slot is working.
🔍
Section 5
Scanner & Copy Problems — Fixes
The ET-2650 features a 1200 × 2400 dpi optical flatbed scanner with 48-bit color and an 8.5″ × 11.7″ scan area. It uses the older Epson Scan software — not the newer Epson Scan 2. Here are the most common scanner issues and fixes:
🌐
“Cannot Connect to Network Scanner”
Open Epson Scan → Settings → verify the printer’s IP address matches the Network Status Sheet. If the IP has changed, update it here. Ensure printer and PC are on the same 2.4GHz network.
❌
Epson Scan Won’t Open / Crashes
The ET-2650 uses Epson Scan (classic), not Epson Scan 2. Uninstall and reinstall Epson Scan from epson.com/support/et2650. On Windows 11, run Epson Scan as Administrator and check compatibility settings.
🖼️
Poor Scan Quality / Blurry Output
Clean the flatbed scanner glass with a soft, lint-free cloth. Use 300 dpi for text documents, 600 dpi for photos in Epson Scan. In Epson Scan → Professional Mode for full resolution and color depth control.
🔌
Scans via USB but Not WiFi
Windows Firewall may be blocking Epson Scan’s network access. Add Epson Scan to the Allowed Apps list in Windows Firewall → Advanced Settings. Also assign the printer a static IP to prevent IP address changes breaking the scan connection.
📄
Copy Output is Faded / Wrong Colors
Check all four 664 ink tanks — all must have ink for copying. Run a Nozzle Check and Head Cleaning via the LCD menu. Confirm the original document is placed flat on the glass, flush with the corner arrow marker.
💾
Scan to Memory Card Not Working
The ET-2650 can scan directly to an SD card inserted in the built-in slot. On the LCD: Scan → Memory Card → set resolution and file type → Start. Card must be FAT32 formatted and not write-protected.
One quirk specific to the ET-2650 that catches many users off guard is the scanner software difference. Unlike the ET-2800 and newer EcoTank models that use Epson Scan 2, the ET-2650 uses the original Epson Scan application. These are two entirely separate programs with different interfaces and installation packages. If you’ve previously used a newer Epson printer, don’t try to use Epson Scan 2 with the ET-2650 — it won’t detect the printer. Always download Epson Scan (not Scan 2) from the ET-2650’s specific support page on epson.com. Similarly, the ET-2650 is not compatible with the Epson Smart Panel app — it uses the older Epson iPrint app for mobile printing. Using the correct software for this specific model eliminates a large proportion of setup and connectivity headaches.
🎨
Section 6
Print Quality Problems & Ink Fixes
The ET-2650 uses Micro Piezo inkjet technology at up to 5760 × 1440 dpi — delivering sharp text and vibrant photo output. Quality issues almost always trace back to clogged nozzles, empty 664 tanks, or wrong settings:
👻
Faded / Light Prints
Inspect all four 664 ink tanks through the transparent windows. Refill any low tank with the correct Epson 664 color. Also check: driver quality setting is not on Draft/Economy — switch to Standard or Best.
〰️
Horizontal Lines / Banding
Clogged nozzle. On LCD: Setup → Maintenance → Head Cleaning → select color → Start. Run 1–2 cycles, print Nozzle Check to confirm, then retry. Repeat up to 3 times if needed.
🟥
Wrong or Missing Colors
Confirm each 664 bottle was filled into the correct tank. Run a Nozzle Check to identify the missing color row, then run Head Cleaning for that specific color only to avoid unnecessary ink waste.
💧
Ink Smearing
Match the paper type in the driver settings to the paper loaded. Over-inking on the wrong paper type causes smearing. The ET-2650’s 664 ink needs 30–60 seconds to dry on plain paper — don’t handle prints immediately.
🔄
Duplex Side 2 Quality Issues
If the second side of duplex prints looks smeared or faded, the ink from side 1 hasn’t fully dried before side 2 prints. Use heavier paper (24lb/90gsm+) and reduce print speed in driver settings. Avoid photo paper for duplex.
📐
Misaligned / Crooked Prints
On LCD: Setup → Maintenance → Print Head Alignment. Print the alignment pattern and select the best-looking option. Also verify paper guides are snug against the paper stack edges.
🔍 Running a Nozzle Check via the ET-2650 LCD
- On the LCD: Setup → Maintenance → press OK → select Nozzle Check → press OK → press Start.
- Examine the printed pattern. All rows should be solid and complete — no gaps or breaks.
- Any gaps = clogged nozzles. Navigate back to Maintenance → Head Cleaning → select the affected color → Start.
- After cleaning, re-run the Nozzle Check. Repeat up to 3 cycles. Wait 12 hours then try Power Cleaning if still clogged.
- Power Cleaning is available in the LCD Maintenance menu — uses significantly more ink but clears severe clogs that Head Cleaning cannot fix.
⚠️
Section 7
Error Codes & LCD Messages — Reference Guide
The ET-2650’s color LCD displays descriptive error messages — a significant advantage over LED-only models. Here’s what each message means and how to resolve it:
| LCD Error / Message |
Meaning |
Fix |
| Paper Out |
Paper tray is empty |
Fan and reload paper in the rear tray. Align guides snugly. Press OK to resume. |
| Paper Jam |
Paper stuck in paper path or duplex unit |
Power off. Open rear cover and duplex unit. Remove jammed paper gently. Check for torn fragments. Restart. |
| Ink Low / Replace Ink |
One or more 664 tanks low or empty |
Refill the indicated color using the correct Epson 664 ink bottle. All four colors required to print. |
| Wi-Fi Connection Failed |
Could not connect to selected network |
Verify 2.4GHz band, re-enter password carefully, reset network settings and retry. |
| Scanner Error |
Scanner hardware fault or obstruction |
Power off. Clear any obstruction on the scanner glass. Unplug for 5 min. Power on and retry. |
| Communication Error |
USB/WiFi connection lost mid-job |
Cancel the job. Check USB cable or WiFi connection. Restart printer and PC, then resend. |
| Ink Pads End of Life |
Waste ink pad saturated |
Contact Epson support (1-562-276-4382) for service. Advanced users: Waste Ink Pad Reset Utility (voids warranty). |
| Memory Card Error |
SD card not recognized or unreadable |
Ensure card is FAT32 formatted. Reinsert firmly. Try a different card to test the slot. |
| Printer Error W-XX |
Internal hardware warning |
Power off and unplug for 5 minutes. Power on. If persists, note the error code and contact Epson support. |
🔧
Section 8
Maintenance Tips to Keep ET-2650 Running Perfectly
As an older model, consistent maintenance is especially important for the ET-2650. Nozzle clogs from infrequent use are the #1 cause of print quality problems on this model:
📅
Print at Least WeeklyRun a Nozzle Check print every week if not printing regularly. This keeps 664 ink flowing through the nozzles and prevents drying clogs — the ET-2650’s most common problem.
🍶
Only Use Epson 664 InkNever use third-party ink or the wrong Epson series. Only Epson 664 (T664 series, 70ml bottles) is compatible. Wrong ink can permanently damage the printhead with no repair option.
🔌
Always Power Off ProperlyAlways press the power button — never unplug from the wall. Proper shutdown caps the printhead, protecting the 664 ink from drying. Improper shutdown is a leading cause of nozzle clogs.
🧹
Clean Scanner Glass MonthlyWipe the flatbed scanner glass with a soft, lint-free cloth. Dust and fingerprints significantly reduce scan quality. Never use solvents or paper towels.
💾
Check for Driver UpdatesPeriodically check epson.com/support/et2650 for updated drivers. Even for older models, Epson occasionally releases compatibility patches for new OS versions.
📄
Use Quality PaperFan paper before loading. Use 20lb (75gsm) or heavier — especially important for duplex printing. Paper dust from cheap reams clogs the printhead faster than any other cause.
🔄
How to Reset Epson ET-2650 — Network & Full Factory Reset
Use when all other troubleshooting fails, or before selling/donating the printer.
📶 Network Settings Reset Only
- LCD: Setup → OK
- Network Settings → OK
- Restore Default Settings → OK
- Select Yes → OK to confirm
- Printer restarts. Redo WiFi setup.
🏭 Full Factory Reset (All Settings)
- LCD: Setup → OK
- Restore Default Settings → OK
- Select All Settings → OK
- Select Yes → OK to confirm
- All settings and network cleared.
⚠️ A full factory reset clears all WiFi settings, preferences, and any custom configurations. Ink levels and printhead status are not affected. After reset, redo WiFi setup and reinstall the driver on your PC/Mac.
The Epson EcoTank ET-2650 remains a capable and cost-effective printer for home users in 2025, despite being an older model. Its auto-duplex printing, built-in SD card slot, color LCD, and support for AirPrint, Mopria, and email printing give it features that many newer budget printers still lack. The Epson 664 ink system continues to provide excellent cost-per-page value for anyone who can source the 664 bottles — which are still widely available online and at major retailers. For users experiencing persistent issues that resist all troubleshooting — particularly waste ink pad saturation or hardware-level failures — it may be worth evaluating a newer EcoTank model such as the ET-2800 or ET-4800, which offer updated 502 ink, current OS driver support, and the newer Epson Smart Panel app experience. But for a well-maintained ET-2650, this guide should resolve the vast majority of issues you’ll ever encounter.
📋 Quick Reference — ET-2650 Cheat Sheet
Everything you need, at a glance
WIFI SETUP
LCD: Setup → Network Settings → Wi-Fi Setup → Wi-Fi Setup Wizard → 2.4GHz SSID → enter password
WIFI NOT CONNECTING
2.4GHz only • Re-enter password • New router → reset network • Move closer • Disable firewall
PRINTER OFFLINE
Uncheck “Use Printer Offline” • Clear queue • Restart Print Spooler • Set as Default Printer
FADED / BANDING
Check 664 ink levels • LCD: Setup → Maintenance → Nozzle Check → Head Cleaning 1–3 cycles
SCANNER NOT WORKING
Use Epson Scan (not Scan 2) • Reinstall from support page • Check IP • Unblock firewall
FULL RESET
LCD: Setup → Restore Default Settings → All Settings → Yes → redo WiFi setup → reinstall driver
Epson Support: 1-562-276-4382 | epson.com/support/et2650
This guide is for informational purposes only. Epson ET-2650, EcoTank, Expression, and MicroPiezo are trademarks of Seiko Epson Corporation. Always refer to your official Epson documentation for warranty-related service. Page yield figures based on Epson ISO/IEC 24712 methodology with Epson 664 ink bottles — actual yields vary.
thank you so much! my printer porblem solved!